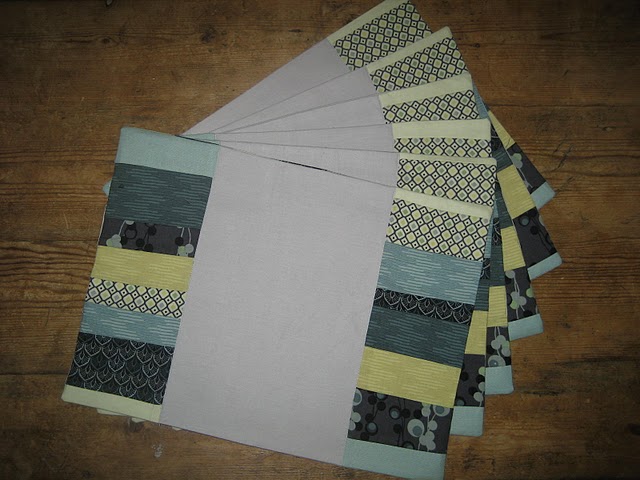
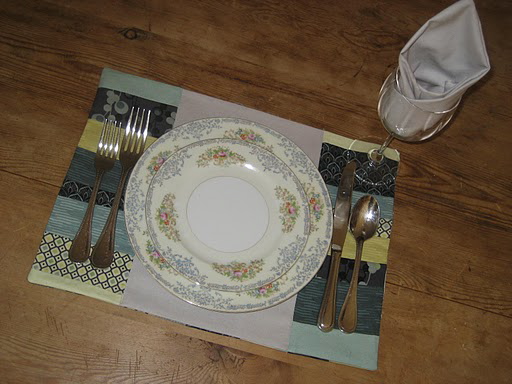
I recently made these placemats for a friend who turned 30. Her house is light and airy with some Japanese influences, as she lived in Japan for a few years. After hunting around a fabric store for a couple of hours(!) with Anne, we were delighted to find these modern fabrics that were created by a Japanese fabric designer. Follow my tutorial and make placemats for your next dinner party! I recommend reading through all the directions before you begin.
**This pattern makes 6, 17" x 11" placemats**
Supplies:
Cotton thread
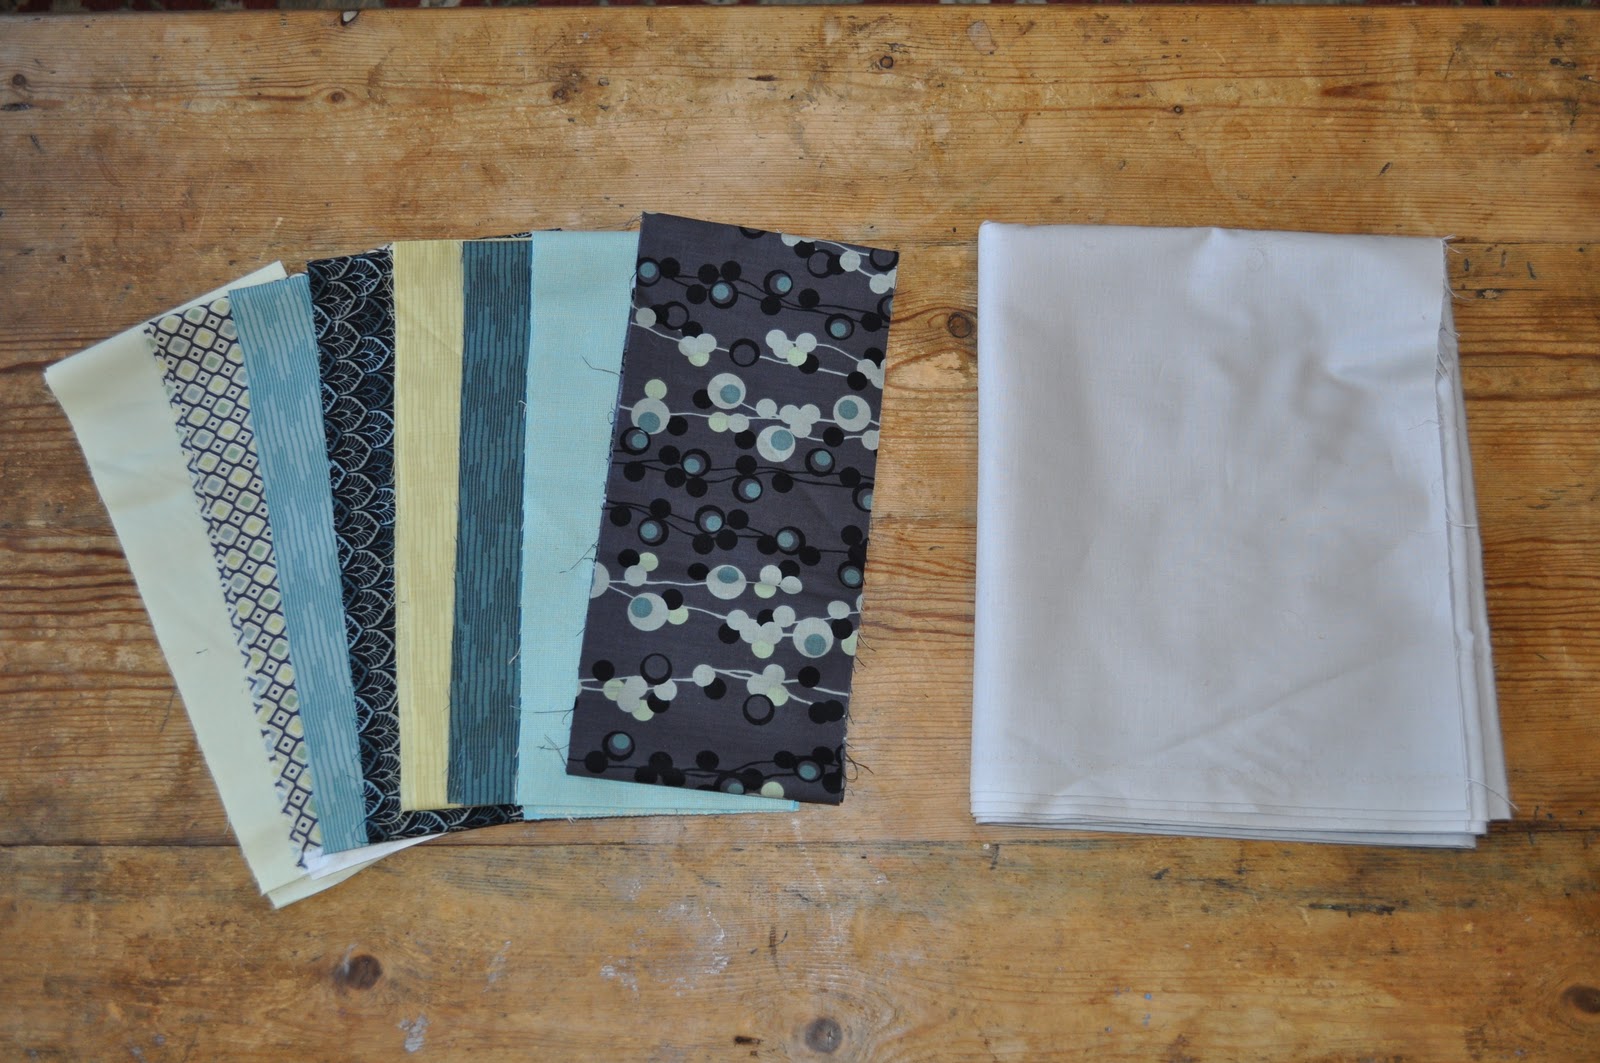
1 1/2 yards (44" wide) neutral colored fabric (with leftovers)
1/8 yard of 8 coordinating fabrics (1 yard total)
2 yards (22" wide) midweight to heavyweight iron-on interfacing
Rotary cutter
Cutting board
Sewing ruler
Scissors
Iron and ironing board
(Use 5/8 inch seam allowance, unless otherwise noted.)

(Please note that this pattern calls for 1.333 yards of neutral fabric (48") and I rounded up to 1 1/2 yards for the sake of simplicity.)

Cut each of the eight strips of coordinating fabric in half. (The strips I used were not completely straight or even, to give the stacked coins a slight "wonky" look.)
Divide the strips into two piles--a unique fabric in each pile. Make sure to distribute the thick and thin strips evenly in the piles, so one pile doesn't have all the thick strips. Each pile should have eight strips total.
Arrange and stack the strips in each pile in a visually appealing way. These will be the "stacked coins" on the sides of your placemats.
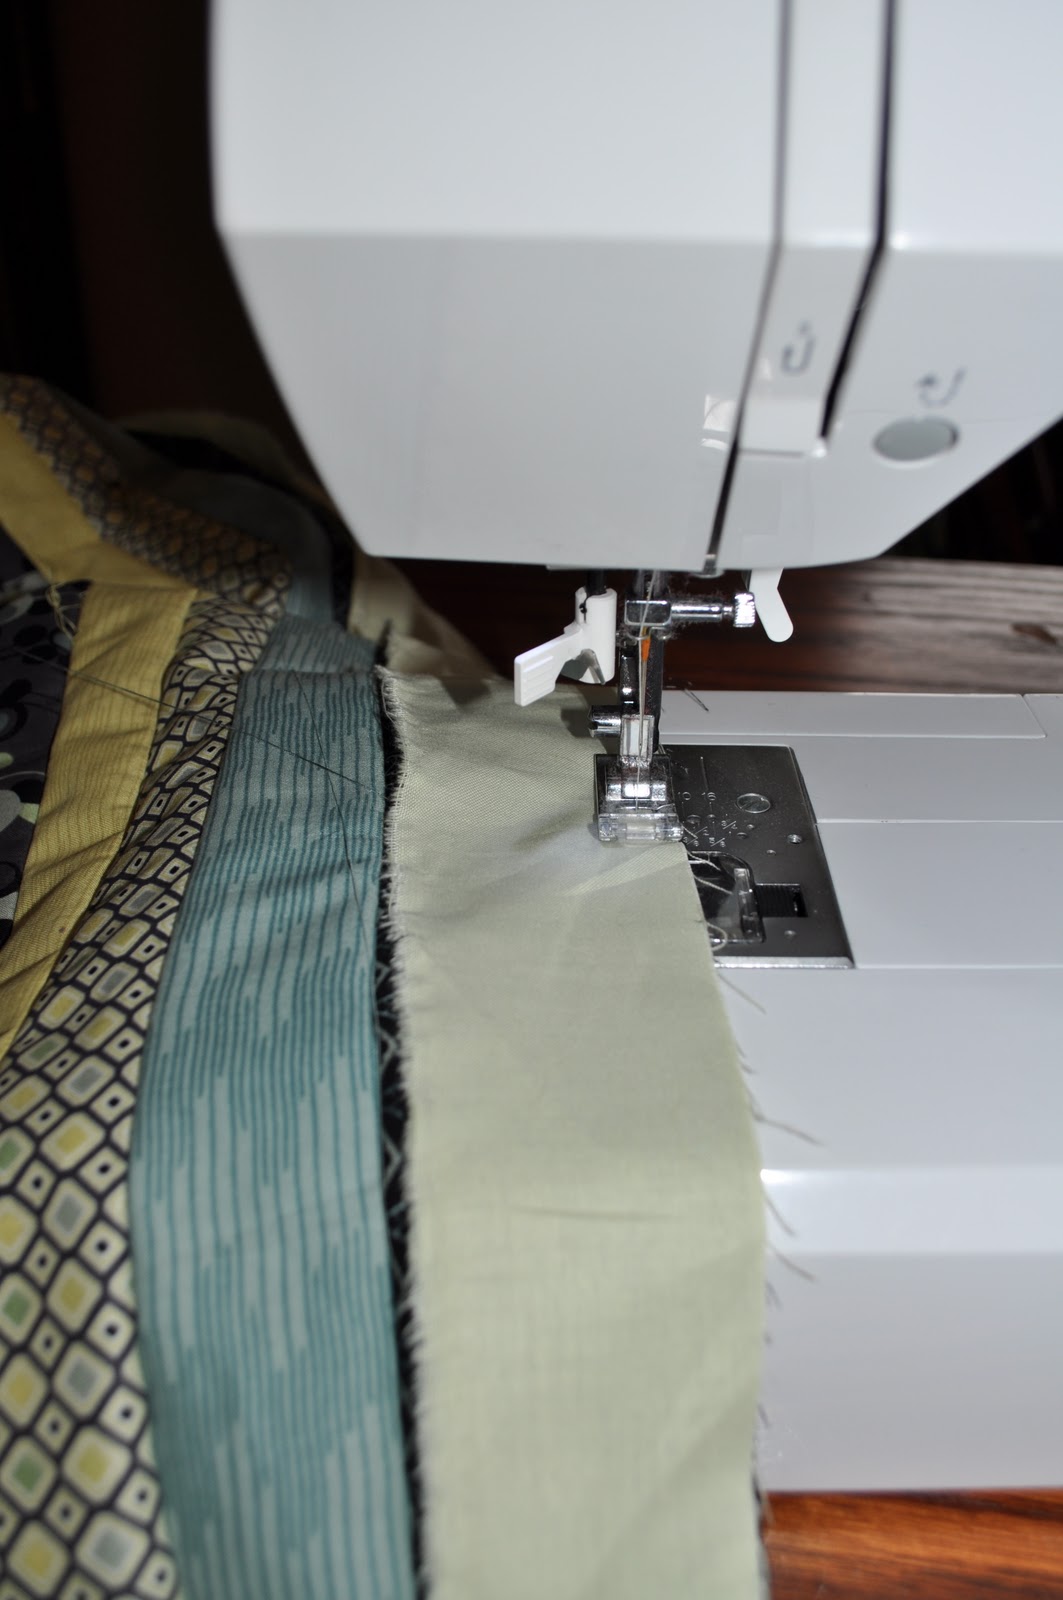
Sew the strips in each pile together, but don't sew the piles together. (You should have two thick strips of stacked coins.)
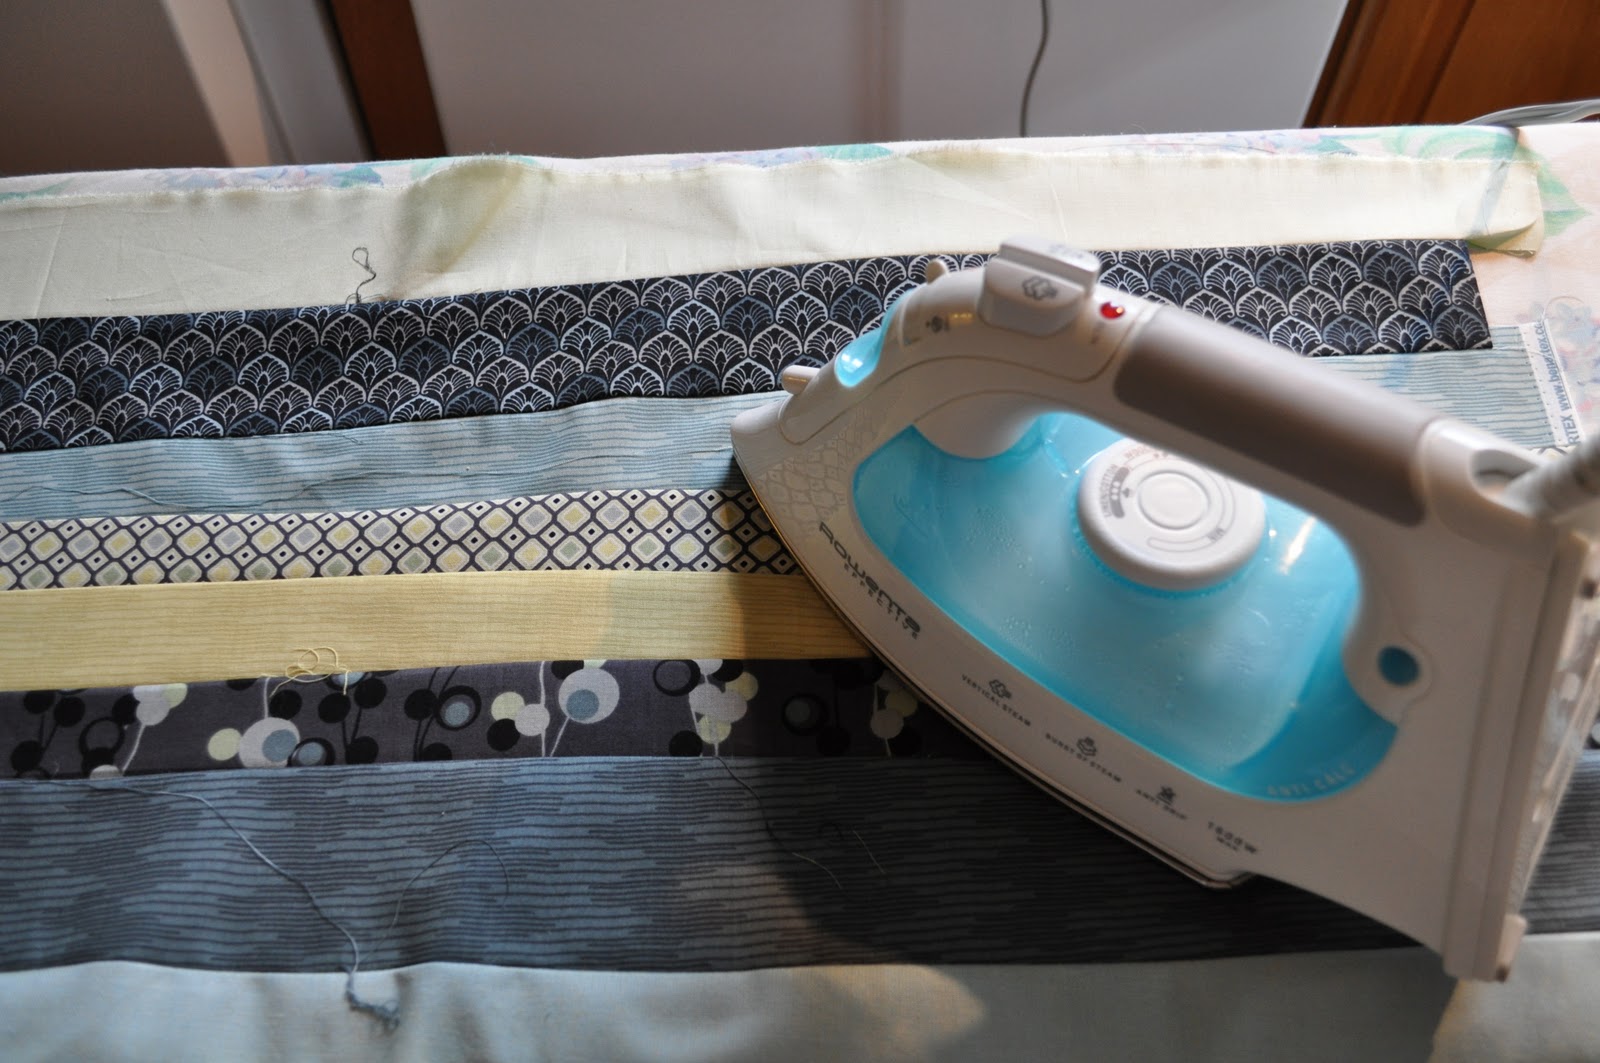
Iron both stacked coin strips. (Press seams open or to the side.)
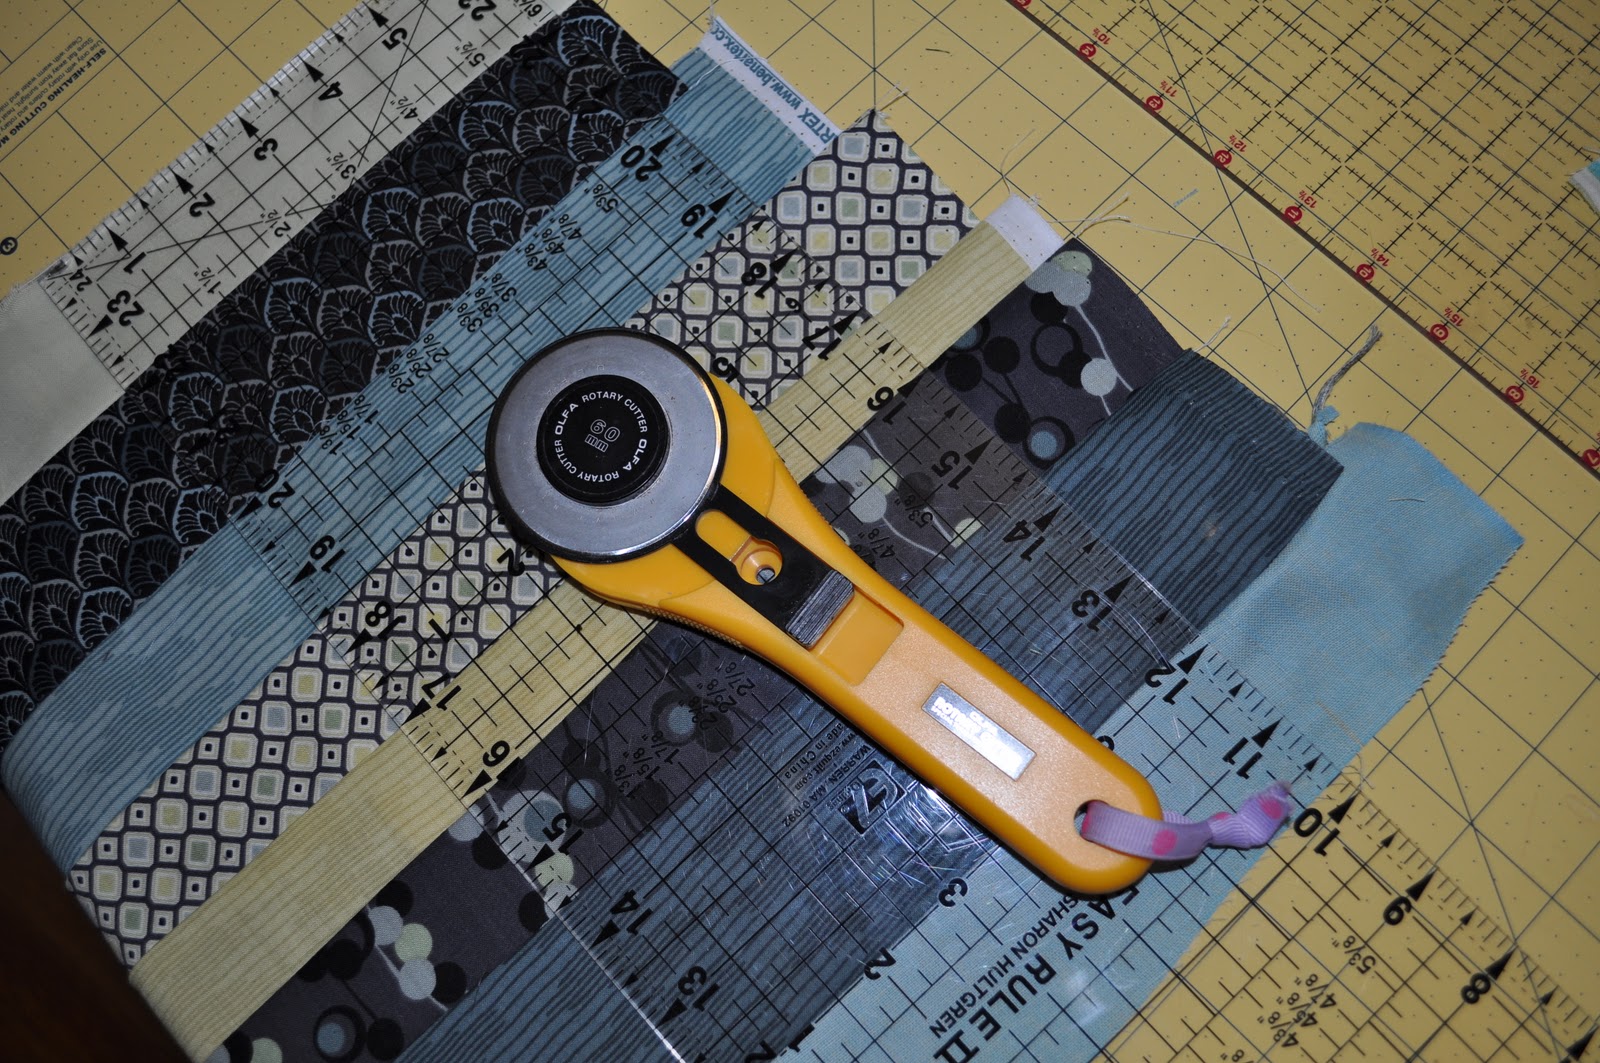
Clean up the edges on each set of stacked coins with your rotary cutter and ruler. Cut 6, 6" pieces from each set of stacked coins. You should have 12, 6" x 12" stacked coins. (You have 6 stacked coins arranged in one way (Style A) and 6 arranged in another (Style B). Keep these piles separate.)
To make the placemat fronts, take one 8" x 12" piece of the neutral fabric that you already cut and pin the stacked coins (Style A) along the long side (12") of fabric. Pin the stacked coins (Style B) along the opposite long side of the fabric. Make sure pretty sides are together and sew both sides. Press seams open or to one side. (Repeat this step for the tops of the other 5 placemats.)
Cut interfacing into 6, 12" x 18" pieces.
Iron the interfacing to the BACK SIDE of the 6 placemat fronts to make them a bit stiff. Trim the placemat fronts to 12" x 18" if necessary. With pretty sides together, sew the back and the front of each placemat together, but leave a 3" opening in order to turn inside them out.
With your scissors, trim the fabric corners to reduce bulk. Turn the placemats inside out and press flat. Pin the the area closed that you left open to turn inside out. Top stitch around the perimeter of each placemat and "in the ditch" where the neutral fabric meets the stacked coins.
You're done!
If you would like clarification on the directions, leave me a comment and I will get back to you. I would LOVE to see pictures of what you make!


6 comments:
What a great pattern!! Your placemats are beautiful!! Thanks for the lovely comments on my blog...I look forward to following yours!! All the best!
Those turned out so great! Thanks for the tutorial, I think these would make a great Christmas present too!
A great tutorial, Emily! I enjoyed watching you design and create these lovely placemats! I agree with Sarah: They would make great Christmas presents!
As the lucky recipient of these gorgeous placemats, I felt I had to chime in. They rock! And not to brag or anything, but they look even better in person!
those turned out so great! and thats so nice you put together a tutorial!
Great tutorial! I love the colors you chose for these. Very cool.
A
Post a Comment