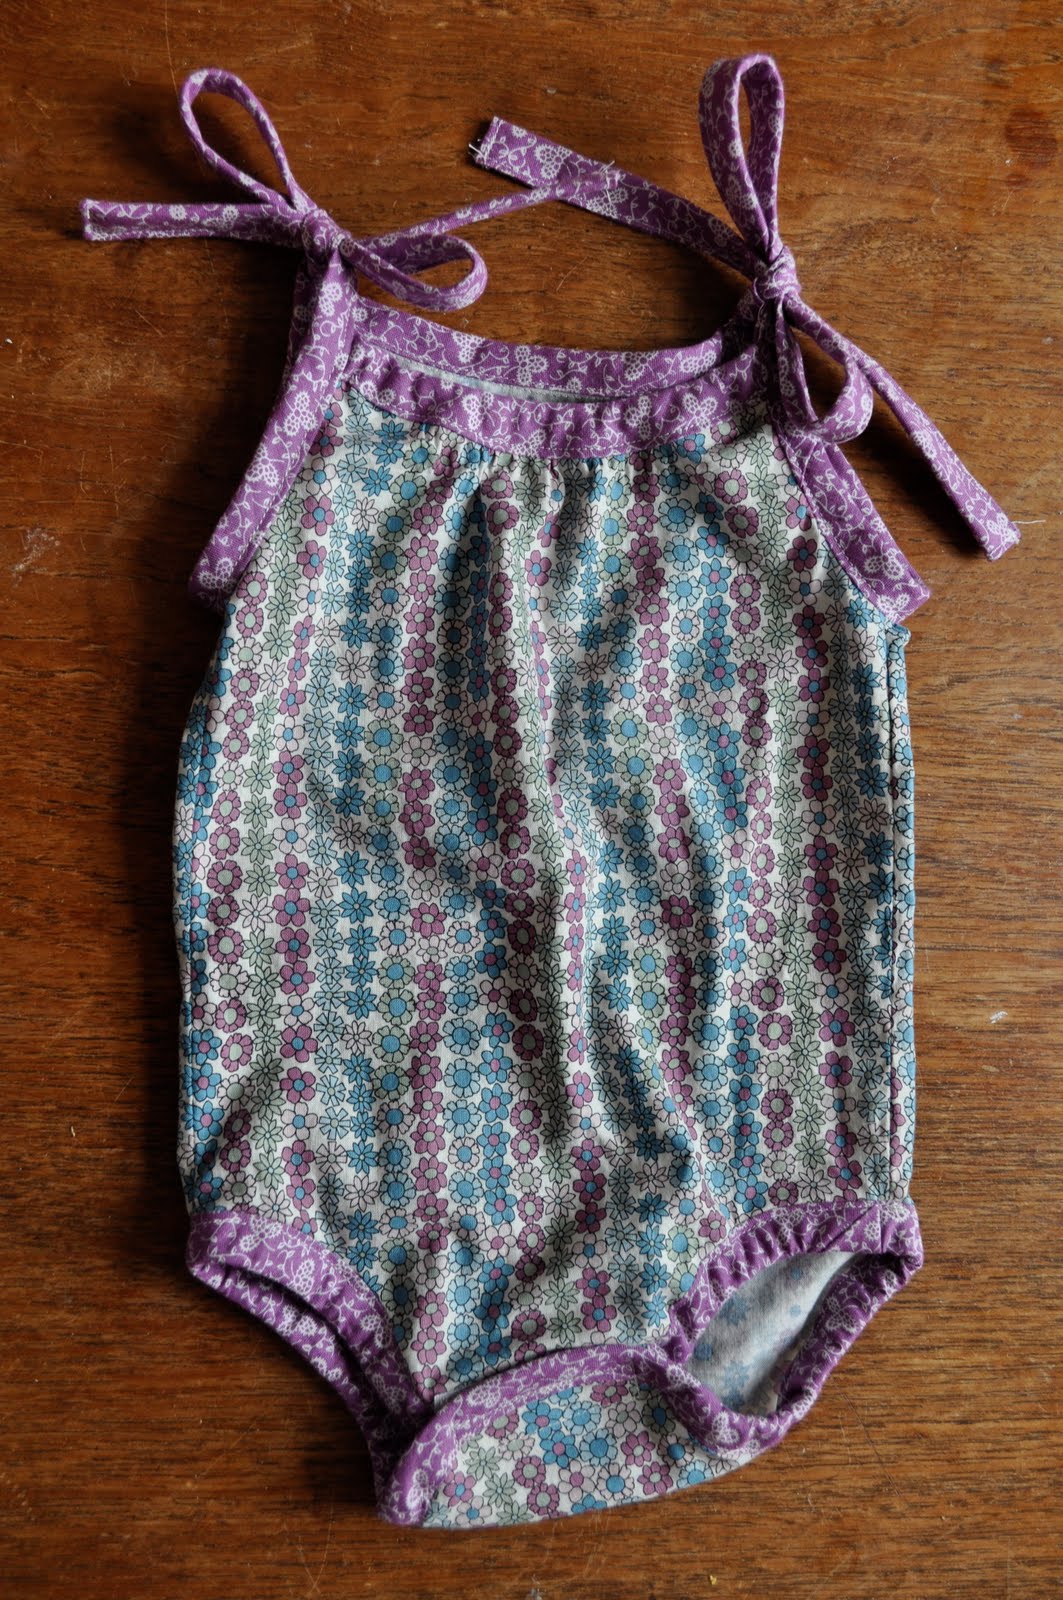
I made this sun suit for my niece, Elliott. She was born last week and we can't wait to meet her in person! I wanted to make her a little romper that she can wear when she strolls around Greenlake this summer. If you would like to make one of your own, follow my tutorial! I recommend reading all of the directions before you begin.
Materials:
1/2 yard soft cotton fabric (you should have some fabric left over)
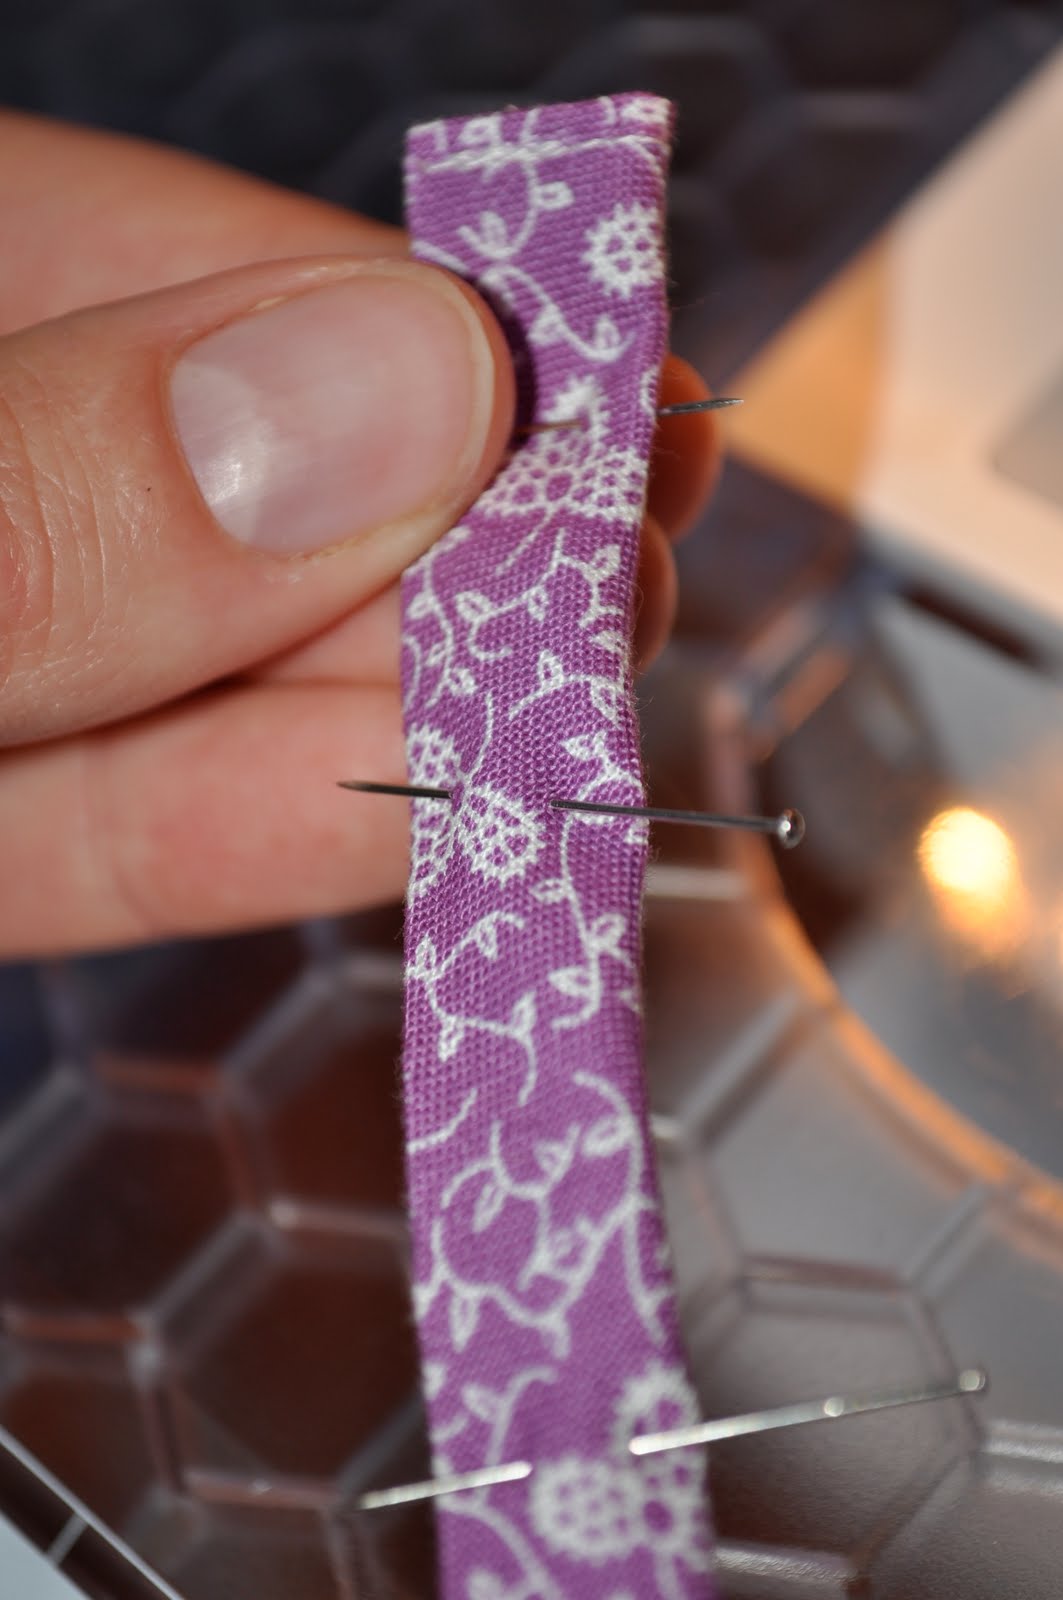
1 package double fold bias tape, or make your own!
thread
seam ripper
old onesie
Sharpie
pins
scissors
1 yard thin elastic
3 inches of velcro

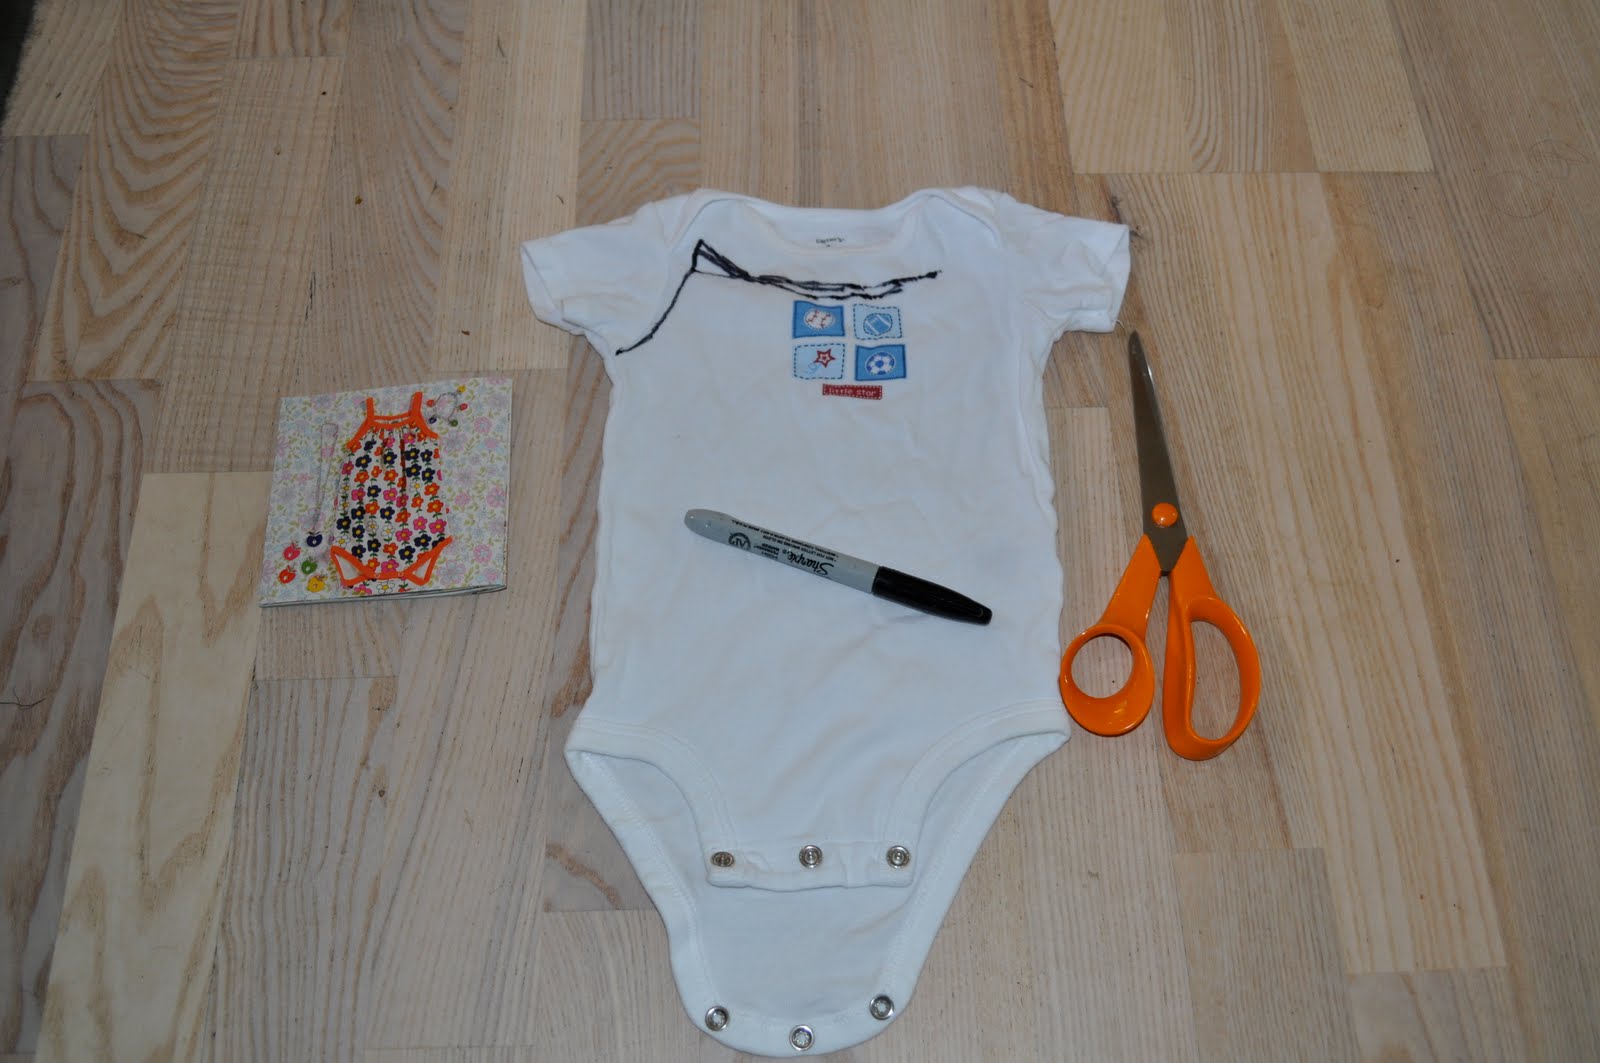
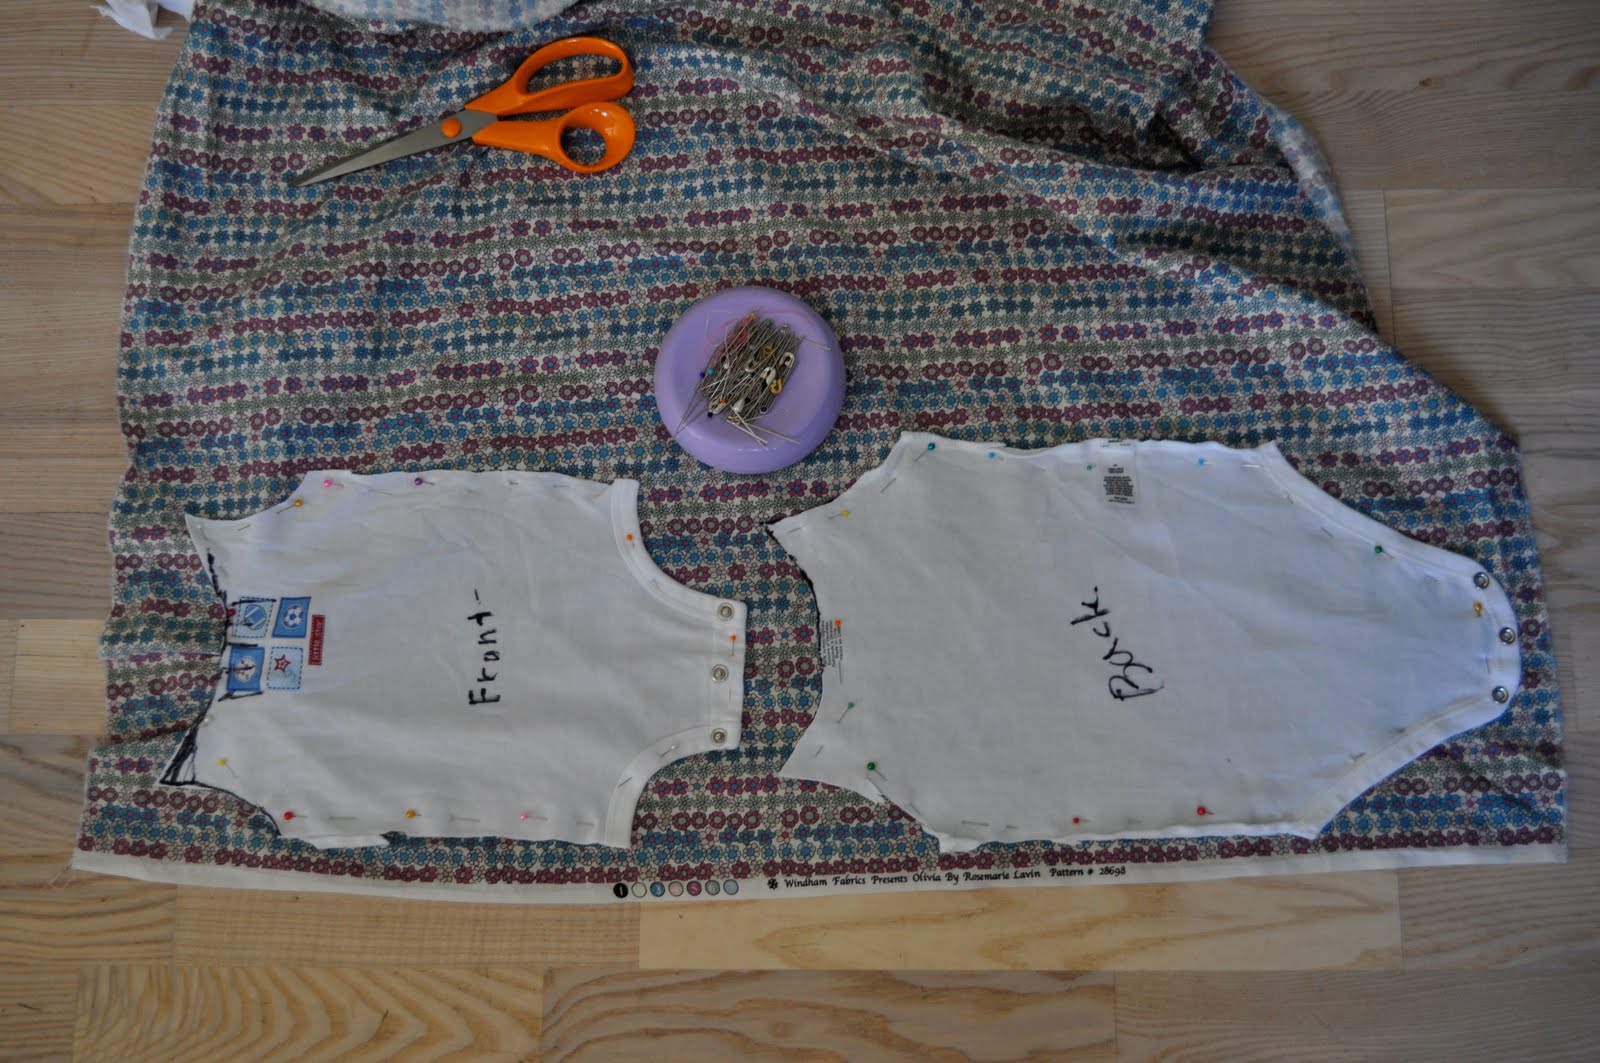
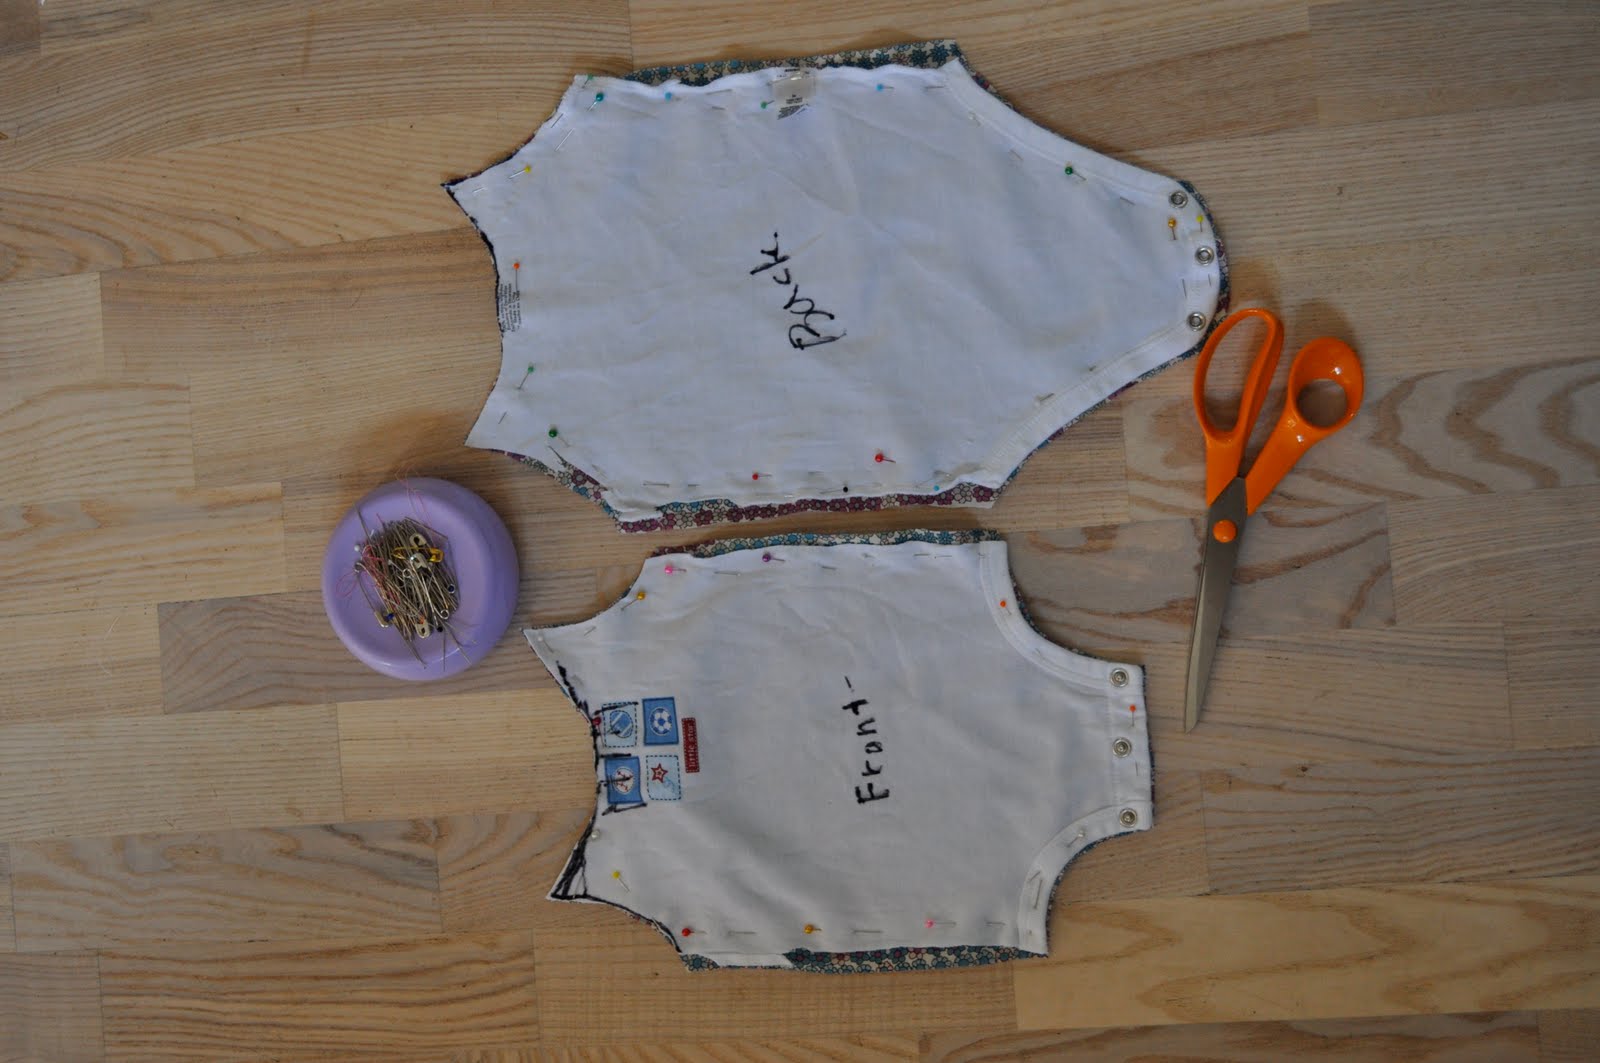
1) Find an old onesie that you are willing to part with. (You can use an old one with stains that will never be used again, or find one at the Goodwill.) Sketch one side of the desired neckline with a Sharpie, making sure to start under the armpit of the onesie. Sketch the "point" (where the straps will attach) below the original shoulder seam. (I used a kids' clothing magazine to get an idea of what the neckline looks like on a romper.)
2) Cut the arms off of the onesie and discard. Carefully slice open the seams on the sides and shoulders of the onesie. You now have two pattern pieces: a front and a back.
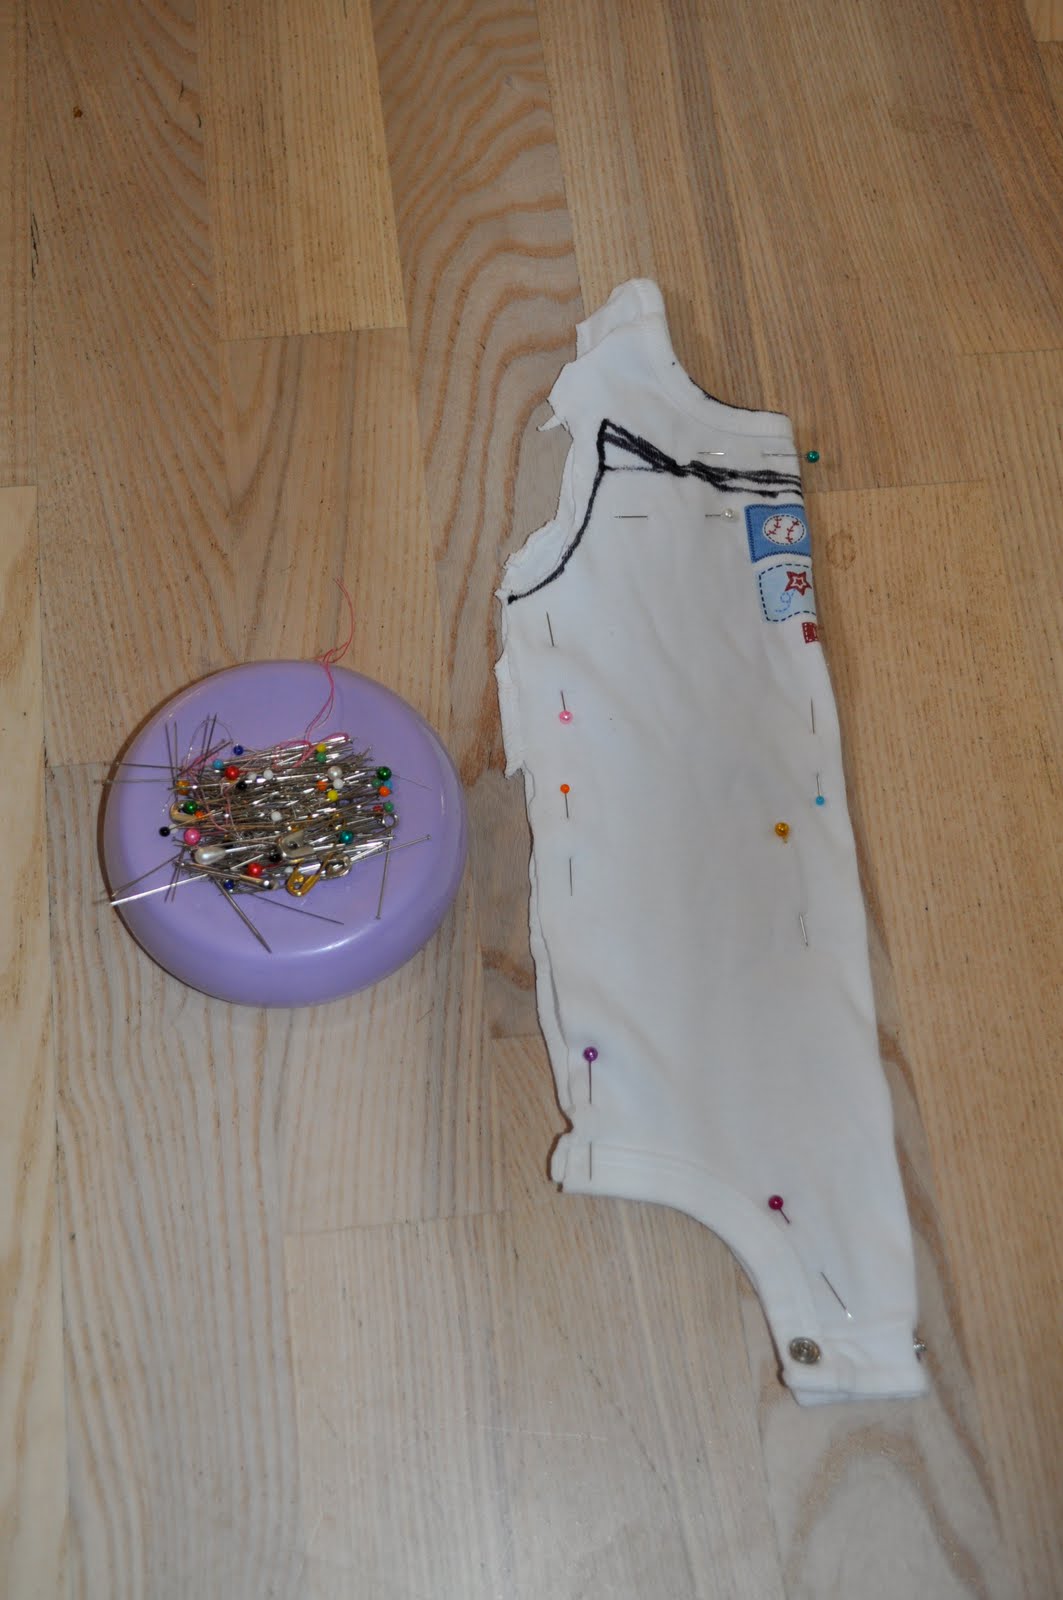
3) Take the front pattern piece with the neckline that is already sketched, and fold it in half vertically. Make sure that the hips line up and carefully pin up the side's raw edges, smooothing any wrinkles in the fabric as you go.
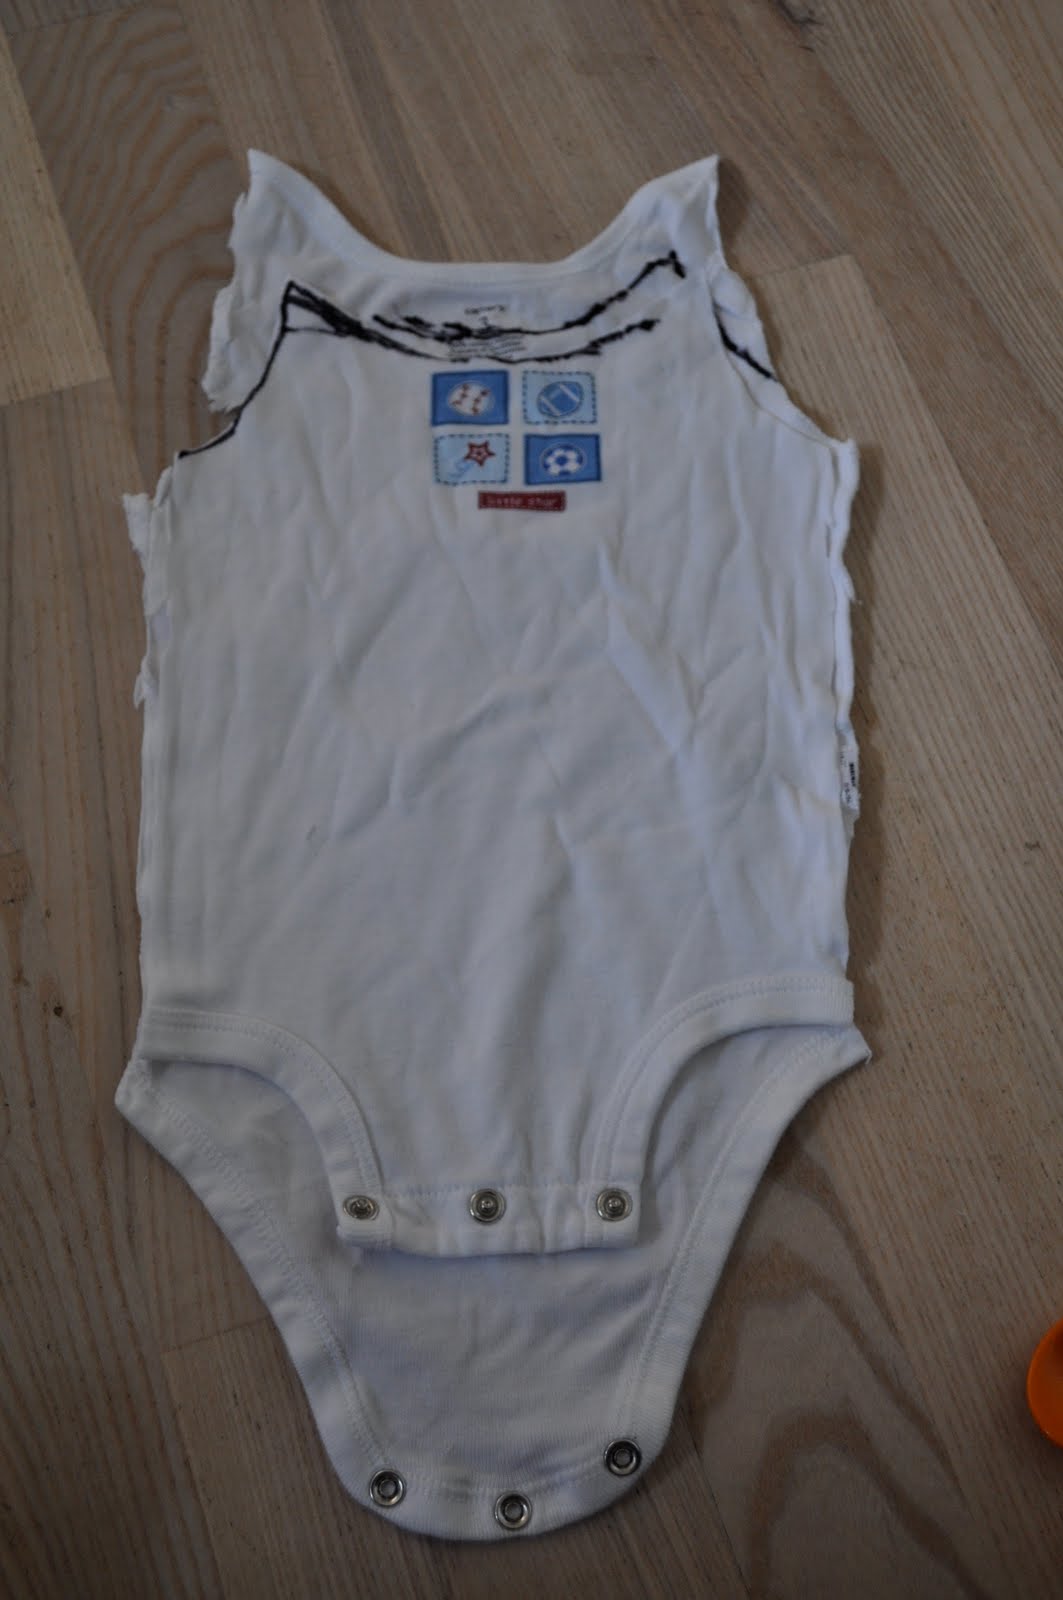
4) With the front pattern piece folded in half, cut the neckline that you drew in step one.
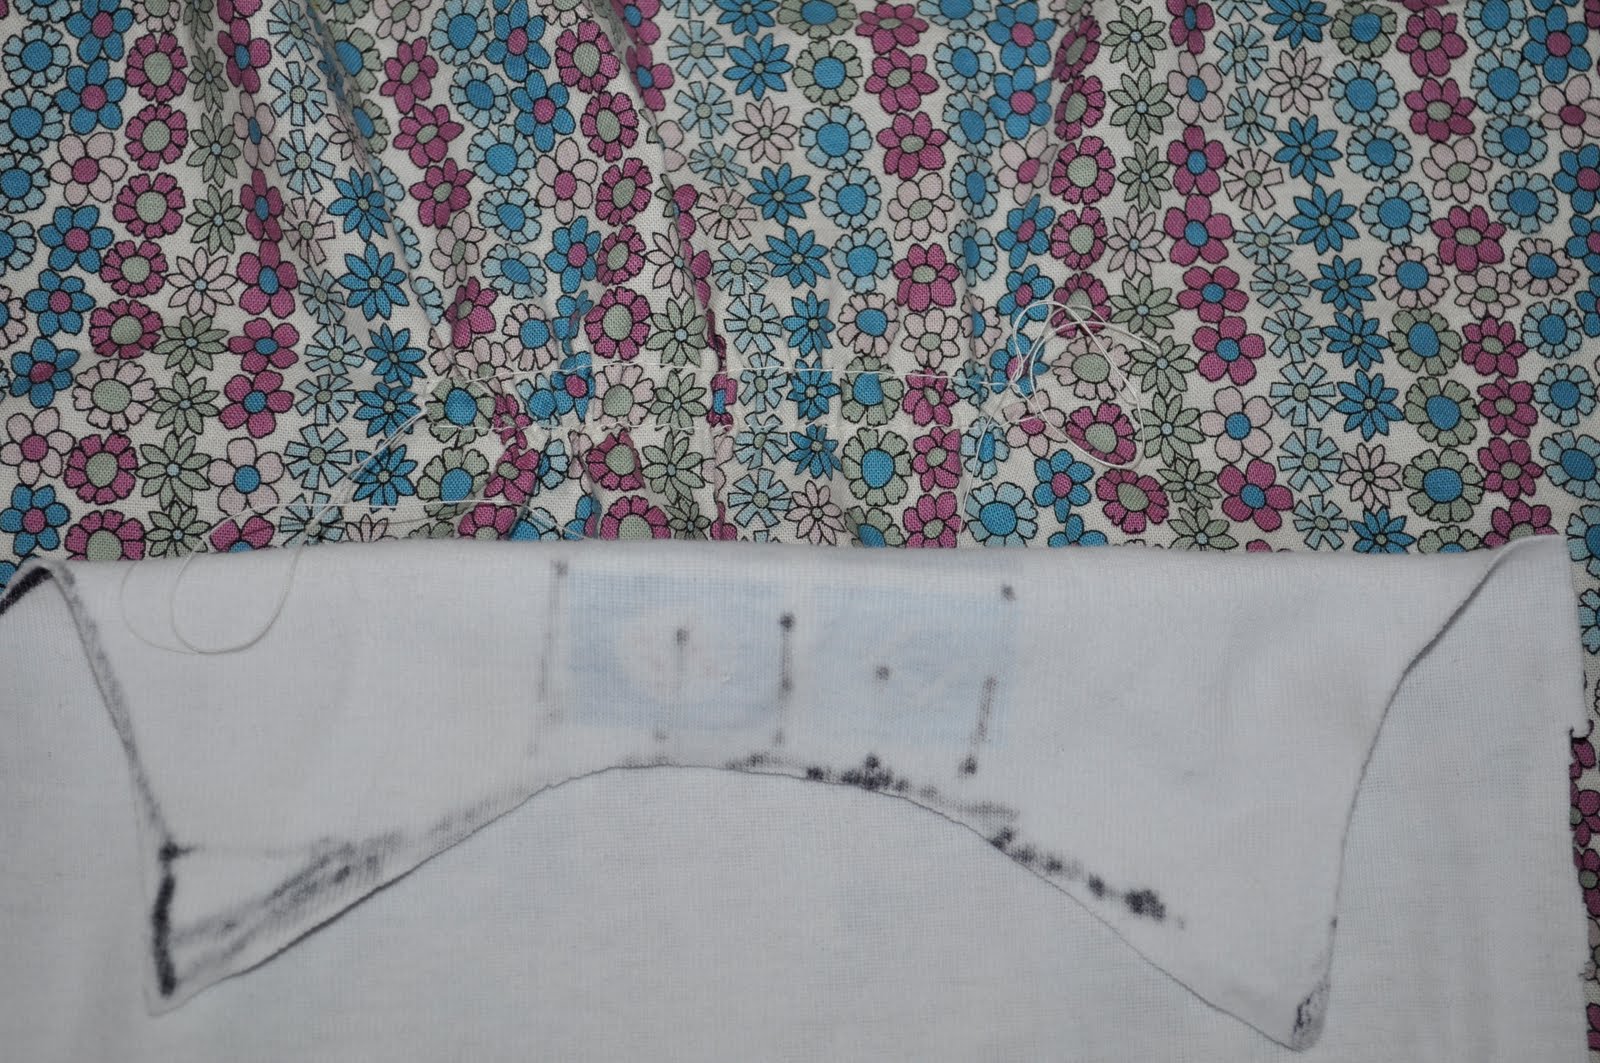
5) Take out the pins and unfold the front pattern piece. (You now have front pattern piece with a symmetrical neckline.)
6) Lay the front pattern piece on top of the back pattern piece, making sure to line up the hips. (I didn't line them up well in the picture.) With a Sharpie, sketch the neckline of the back pattern piece. (I made the neckline of my back pattern piece slightly higher than the front.)
7) Fold the back pattern piece in half vertically, and repeat step three. Don't forget to line up the hips of the back pattern piece!
8) With the back pattern piece folded in half, cut the neckline that you just sketched. Take out the pins on the back pattern piece, and VOILA! You now have a back pattern piece with a symmetrical neckline. Symmetry is a good thing.
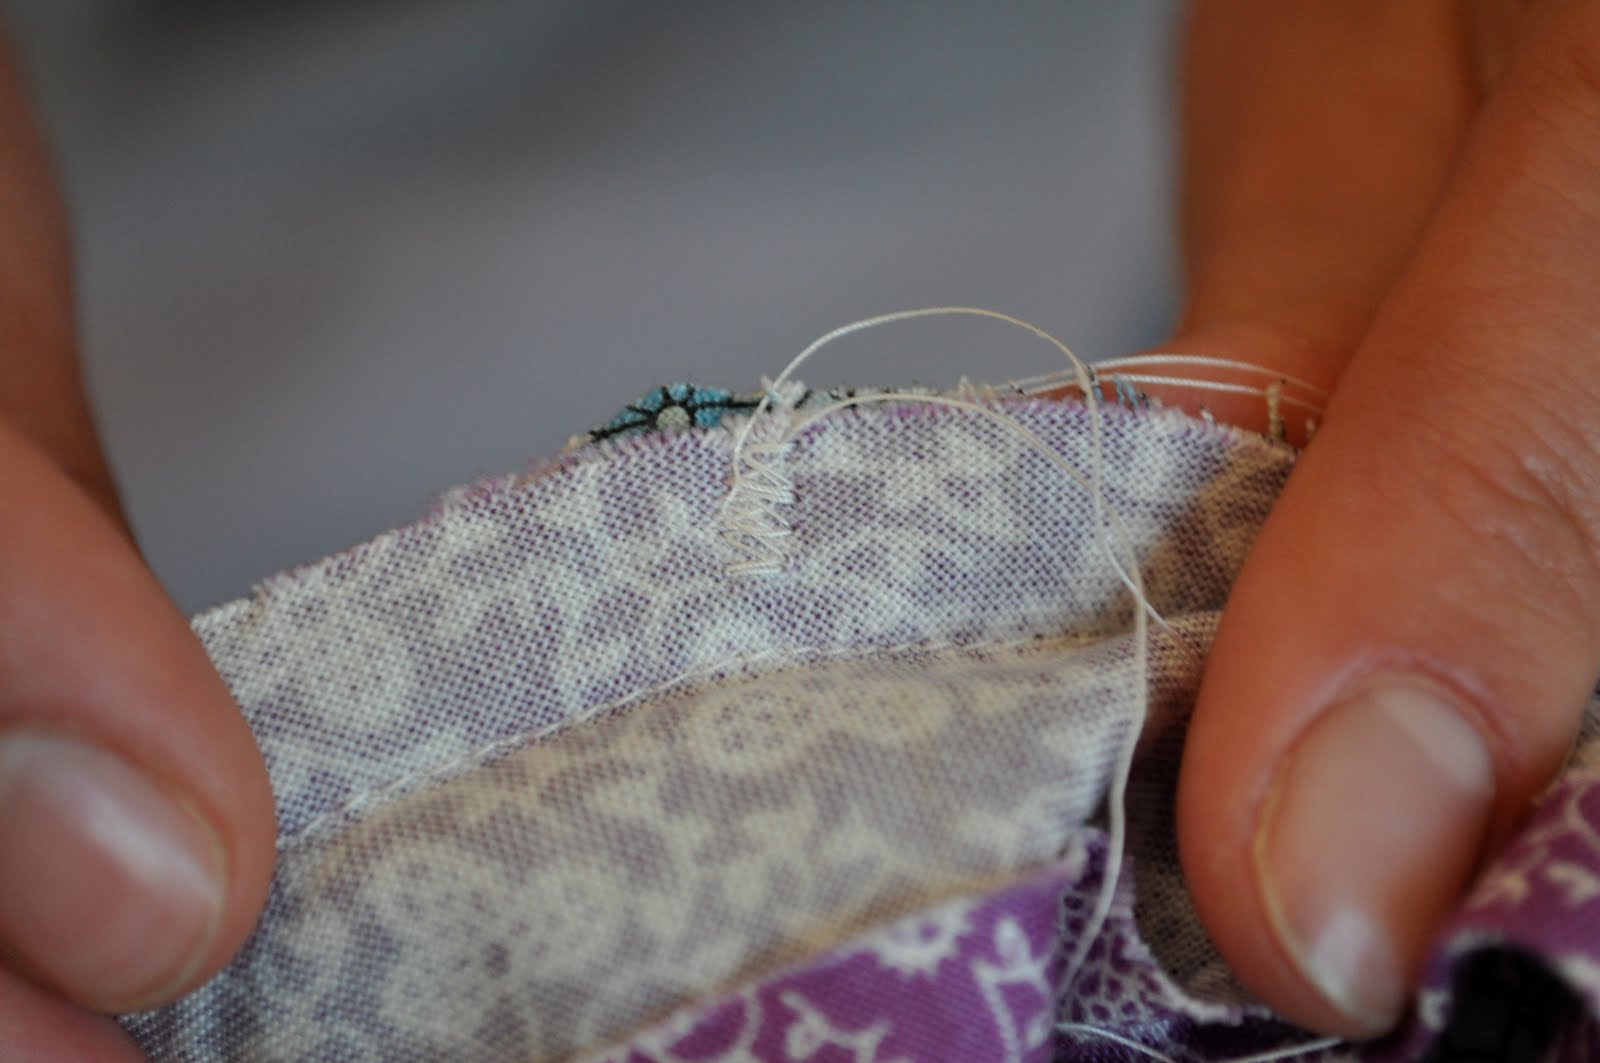
9) To gather the front of the suit, sew a basting stitch that is about 3 1/2 inches long near the top of the fabric you are using. When you cut the thread from the machine, leave about four inches of thread on both sides of the basting stitch. Half an inch below the basting stitch that you just made, sew another basting stitch that is parallel. Leave about four inches of thread on this stitch, too.
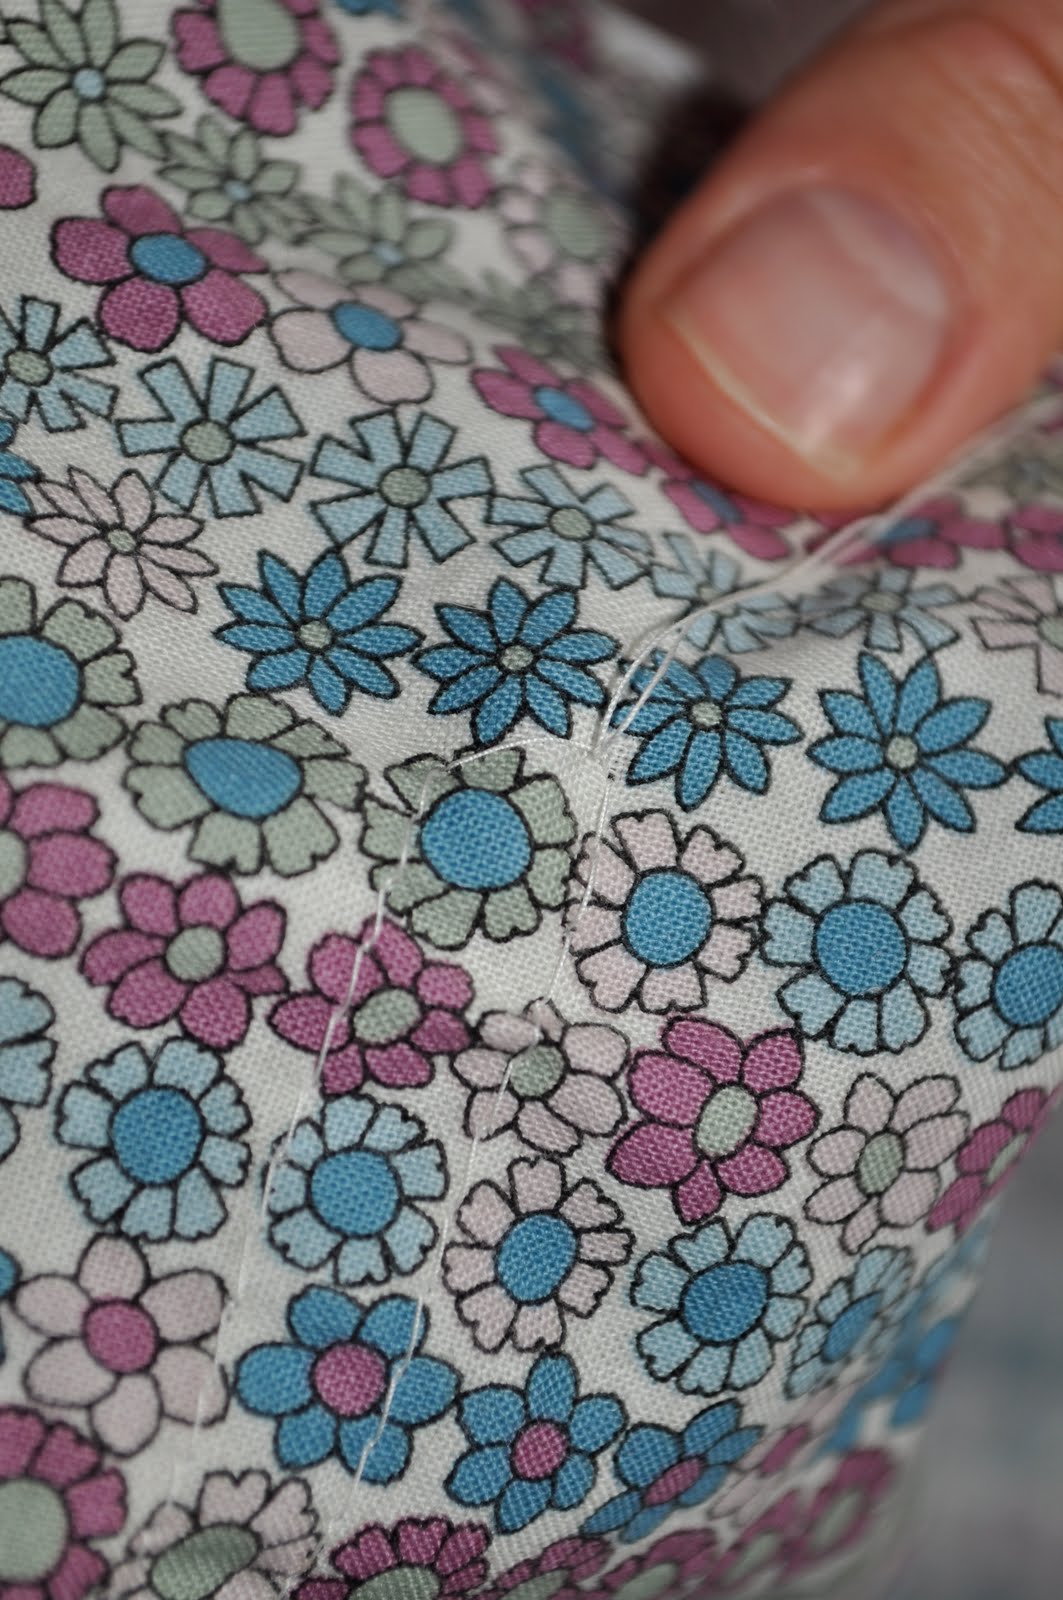
10) You now have eight loose threads--four on the "right side/pretty side" of the fabric and four on the back. With the right side of the fabric facing up, take the two loose threads on the left side of the fabric and knot them together. Flip the fabric over, and do the same thing directly below the knot you just made.
11) With the pretty side of the fabric facing up, take the two loose threads that are left and carefully pull and gather the fabric. Once you do this, knot these loose threads like you did in step ten--on both sides of the fabric. (You now have four knots holding the gathers in your basting stitches in place.)
12) Lay the fabric flat. Position the neckline of the front pattern piece slightly above the secured basting stitches that you just made.
13) Pin the front pattern piece to the fabric. Pin the back pattern piece to the fabric. Make sure that the fabric's pattern is going in the same direction for both the front and the back.
14) Cut the fabric, but add 5/8 inch on the THE SIDES of the front pattern piece and the back pattern piece. (We have to account for the seam allowance.) You now have a front panel and a back panel.
15) With the right sides of the fabric together, pin the front panel and back panel together. Make sure that the hips line up on each side. Sew the side seams. (The armpits might not line up at this point and that is okay.)

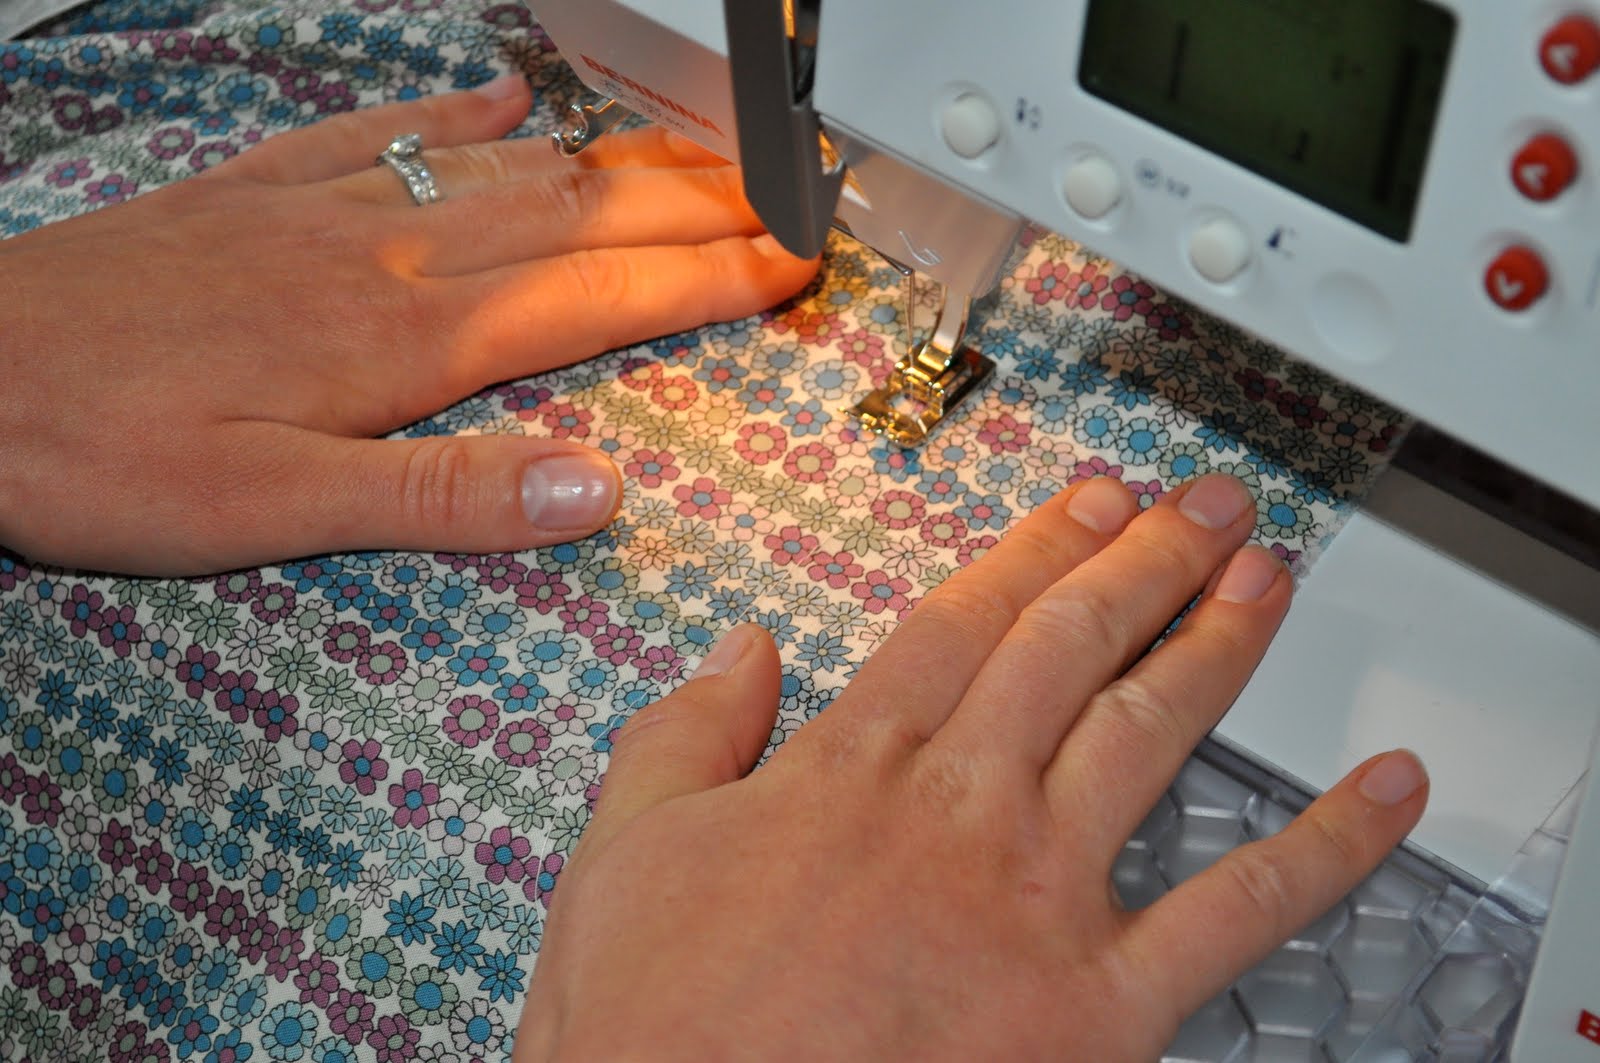
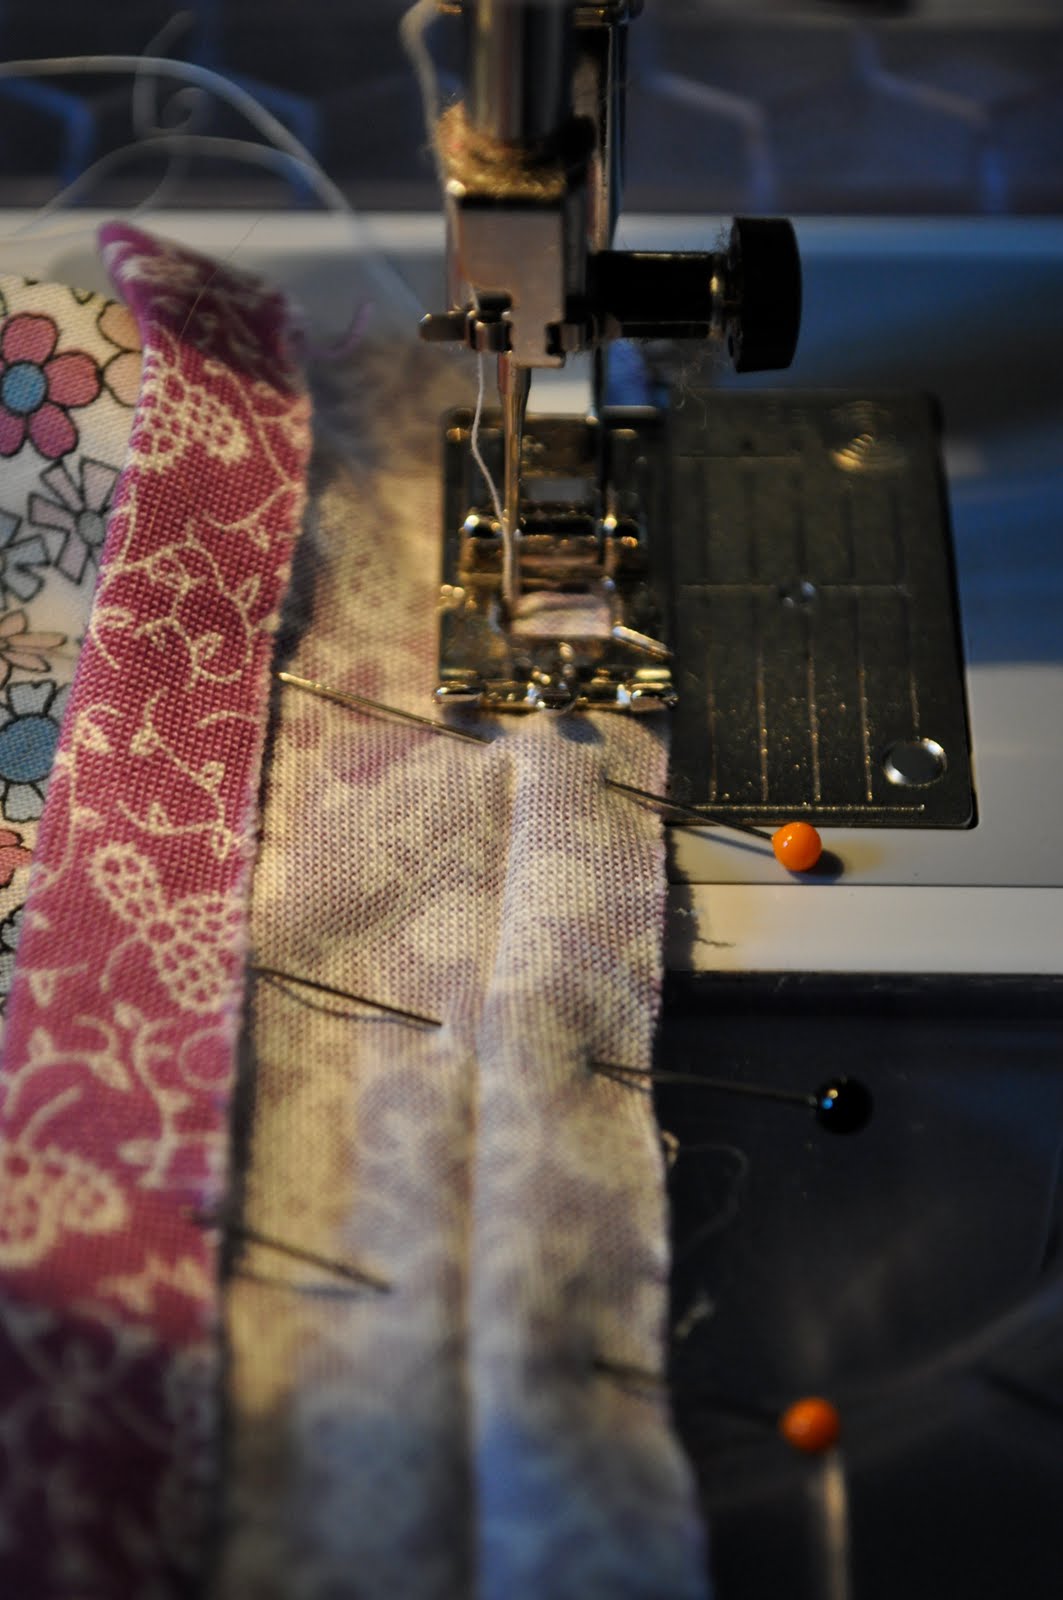
15) Pin the double fold bias tape along the raw edge of the neckline of the front panel. Make sure the pretty sides are together! Sew a 5/8 inch seam across the neckline and remove the pins as you sew. Trim the bias tape when you get to the end of the neckline.
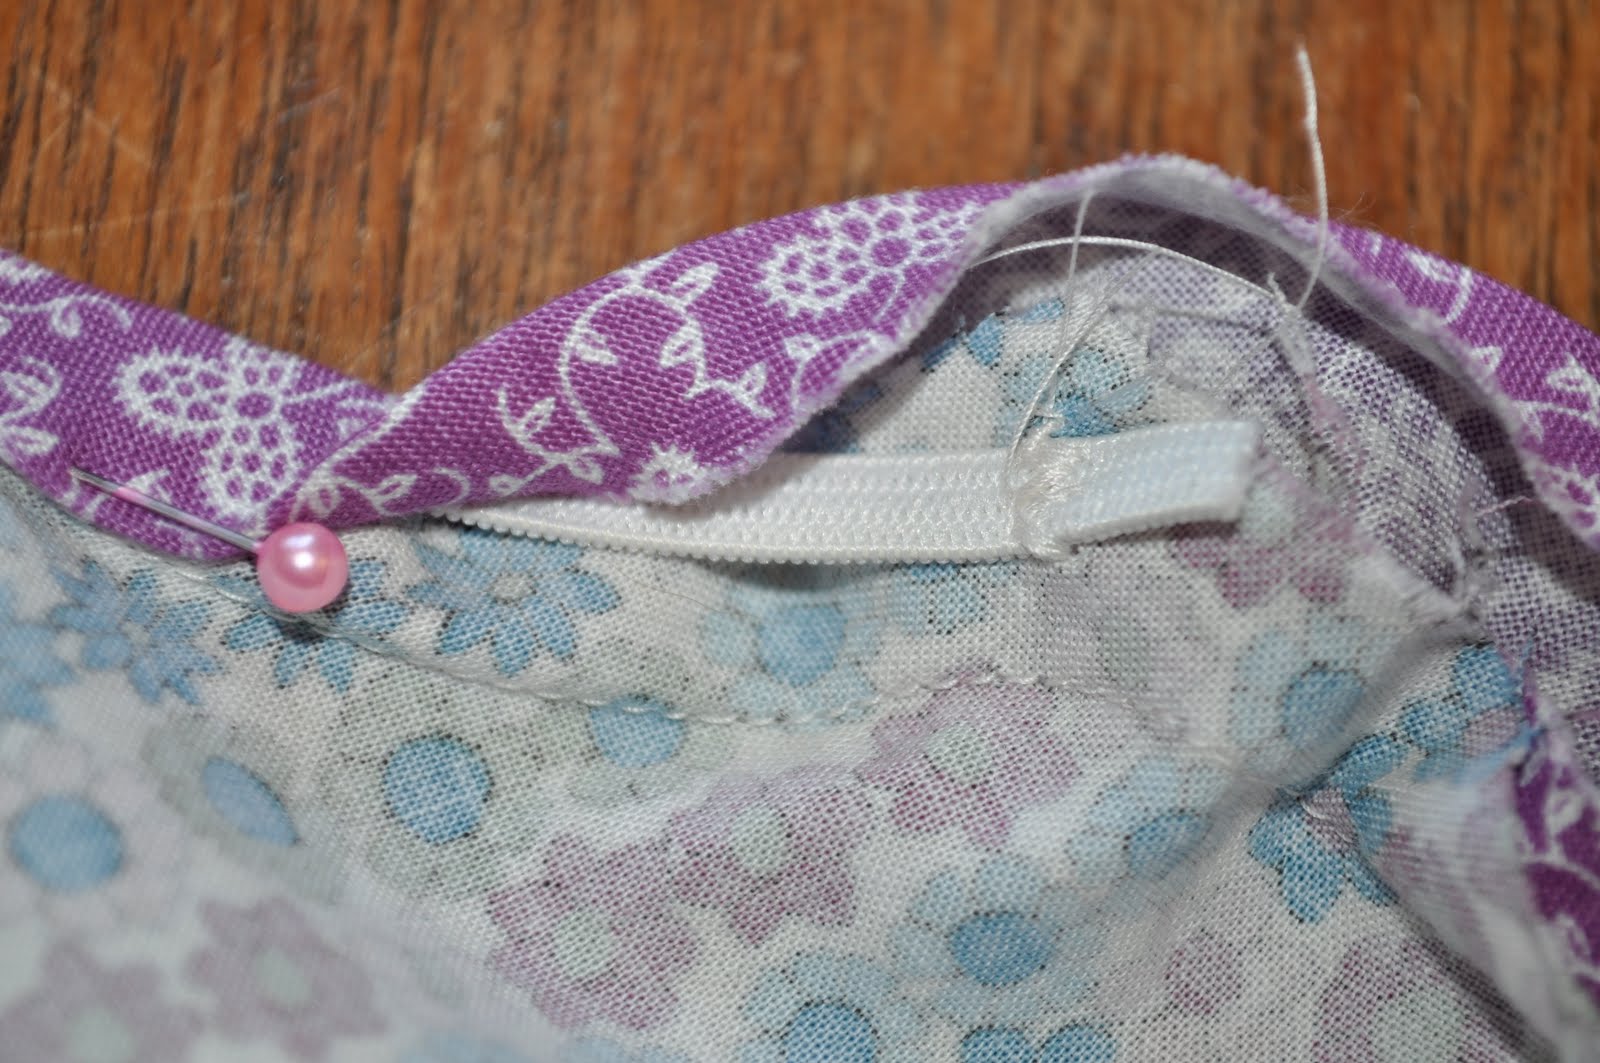
Cut a piece of elastic that is slightly shorter than the length of the front neckline. Sew the elastic ends to each end of the neckline on the selvage--you can sew by hand or use the zig zag stitch on your machine. Fold the bias tape OVER the raw edges of the neckline (enclosing them and the elastic), pin, and top stitch. The elastic creates a slightly gathered neckline.
16. Pin the double fold bias tape along the raw edge of the neckline of the BACK panel. Again, make sure the pretty sides are together. Sew a 5/8 inch seam across the neckline and remove the pins as you sew. Trim the bias tape when you get to the end of the neckline. Fold the bias tape OVER the raw edges of the neckline (enclosing them) pin, and top stitch.
17) If the armpits do not line up on the front panel and back panel, grab your scissors trim a little bit until they line up. Make it work!
18) Pin the double fold bias tape along the raw edge of the of the sun suit's bottoms. You will use one piece of bias tape and will be rounding corners around the perimeter of the bottoms. Make sure the right sides of the bias tape and fabric are together. Sew the bias tape to the fabric.
19) I decided to use elastic around the legs of the sun suit, since I used cotton fabric which isn't stretchy. (Elastic gives the suit some shape.) Where the diaper closure begins, secure the elastic to the selvage that will be enclosed by the bias tape. (You can use the zig zag stitch on your machine or tack by hand.)
Make sure that you don't sew all the way through the fabrics, as you do not want to see this stitch from the outside!
20) With the bias tape, enclose the raw edges along the suit's bottom and pin in place. Carefully slide the elastic in the casing that you are making, and create a gentle gather with the elastic. (You don't want the elastic around the legs to be too tight for the baby.) Cut the elastic and secure at the other diaper closure, using the zig zag stitch.
21) Repeat steps nineteen and twenty for the other leg of the bottoms. You want to create a SLIGHT gather in the leg area with the elastic. You're almost done!
22) Top stitch the bias tape all along the bottoms and make sure you don't accidentally sew the elastic that is enclosed.
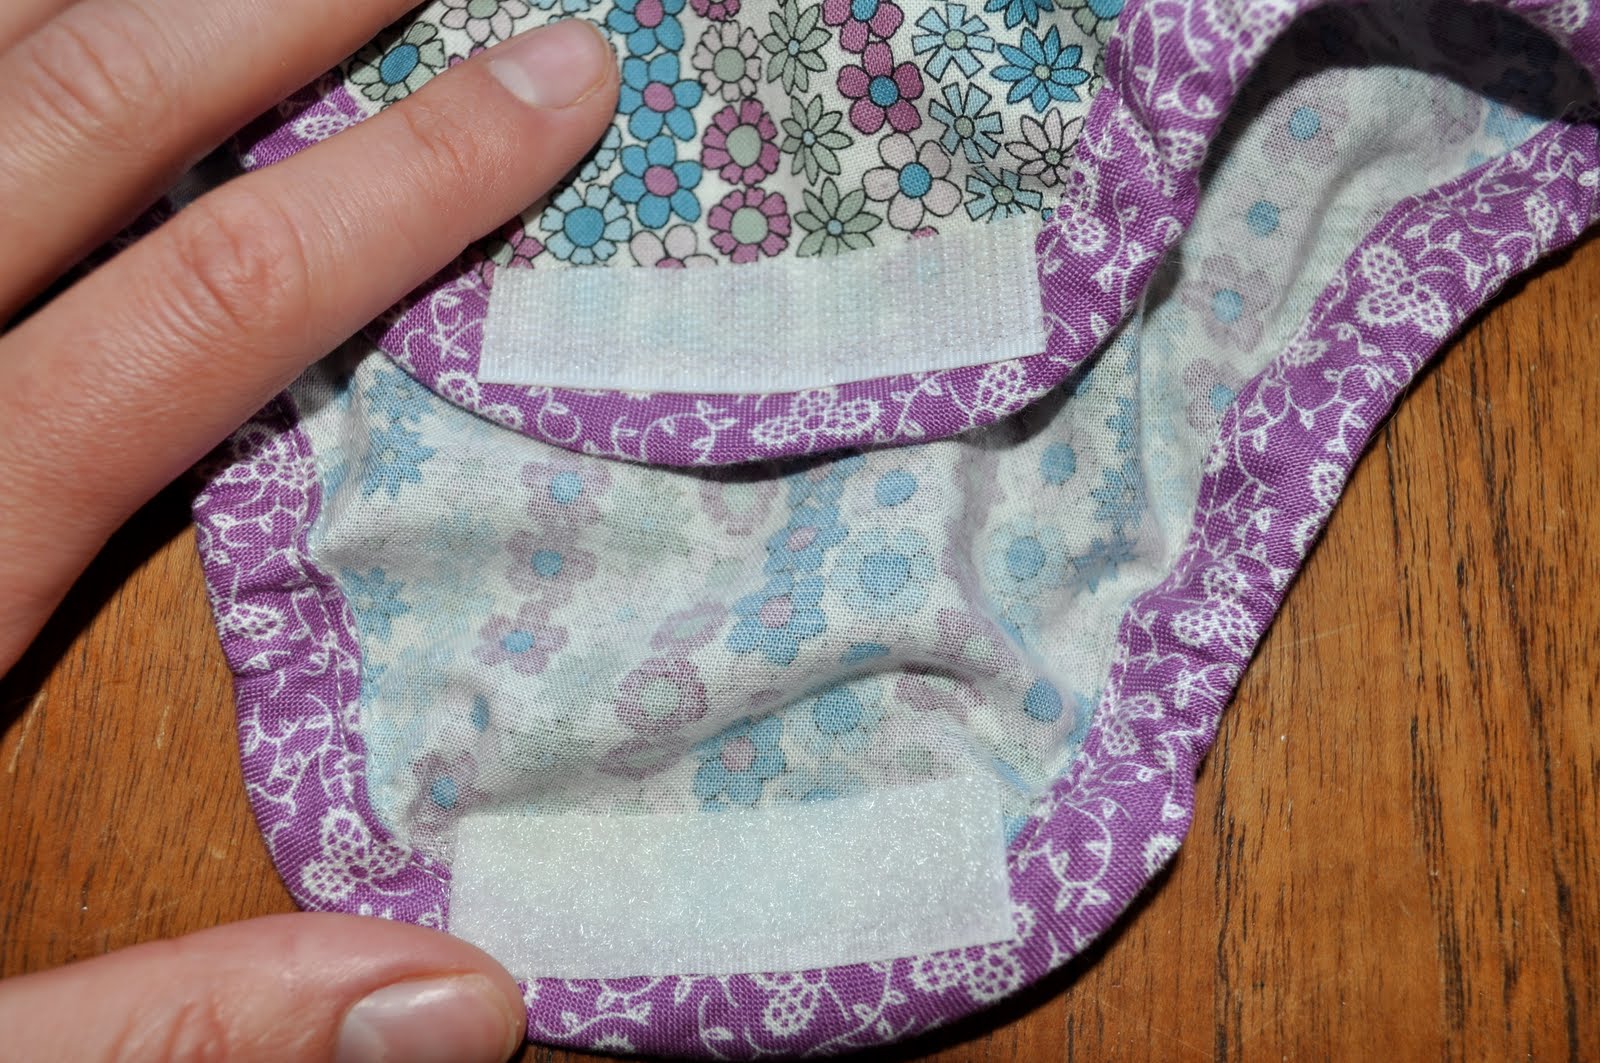
23) Take the 3 inch piece of velcro and place it on each side of the diaper closure. You will most likely need to trim the velcro to fit the diaper closure. The velcro I used stuck like tape, which was great. Make sure the top and bottom diaper closure line up.

24) Top stitch along the four sides of each piece of velcro.
25) Now it is time to make the darling ties. Pin bias tape (pretty sides together) along one armpit, with about one foot of bias tape on each side of the armpit.
26) Make a 5/8 inch seam along the armpit.

Fold the bias tape over the raw edges of the armpit and pin in place.
Continue to pin up the bias tape on each side, to create the ties. Repeat steps twenty-five and twenty-six on the other armpit.

27) Fold over the top raw edge of the straps and top stitch. Trim the corners so they don't stick out. Top stitch the bias tape straps and armpit area.
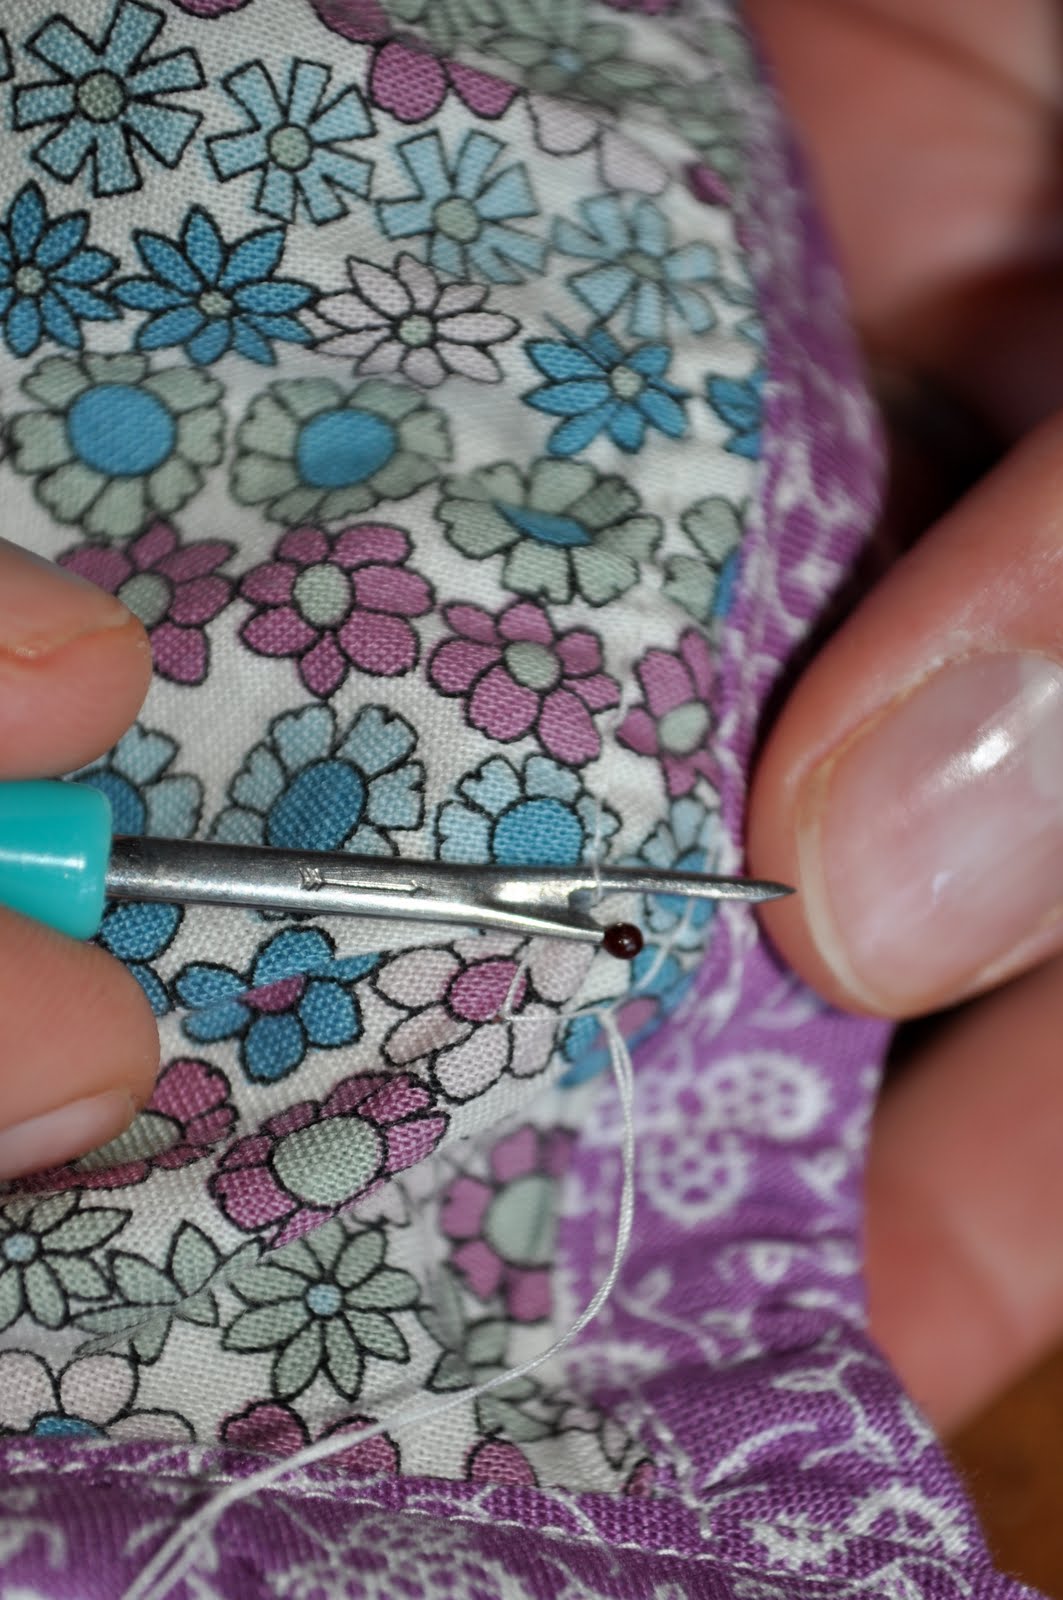
Remember the two basting stitches that you made? It is time to rip those seams out.
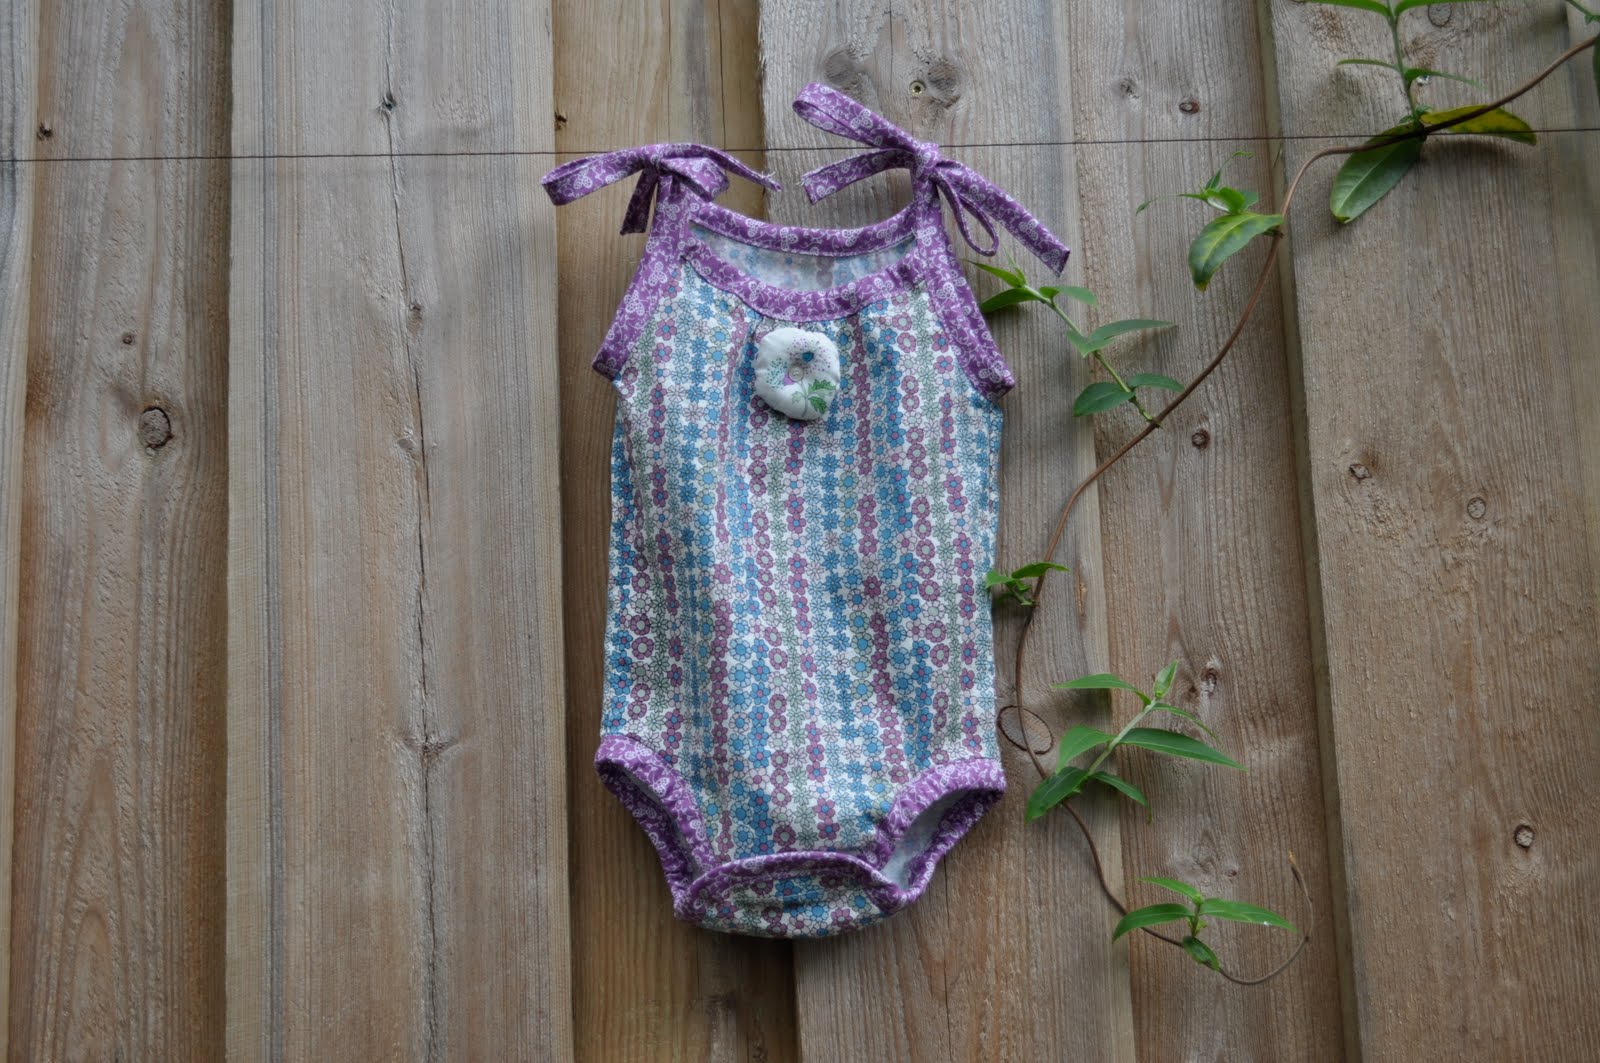
Now admire your work and think about all the people who will ooh and ahh over your work at the next baby shower that you attend. Good job.

If you follow this tutorial, please give me feedback and I will continue to edit the directions to improve the tutorial. I would also love to see pictures of what you make. Happy sewing!

Featured on Prudent Baby


16 comments:
Great job! This is SO cute and I actually feel like I COULD make one...but I probably won't :)
I love that you just whipped this up. Keep up the great work!
I LOVE YOU!
Aaron
I just LOVE this little sun suit! You must post pictures of Elliott wearing it! Just curious, what size onesie did you start with (not that it would matter, since you can make this with any size!) and where did you get that adorable fabric?! Is it Liberty? Can't wait to try this!!
Thanks, Sarah and Hubby!
I used a 3 month onesie that Ethan outgrew long ago. I would recommend using one a bit bigger than the size you wish to make because cotton doesn't stretch like knit. (You don't want the sun suit to be too tight.)
I bought the fabric at a Danish fabric store with this project in mind!
thank you for the encouraging comment:)
You have a wonderful blog:)
Great tutorial, Emily! And such a cute little sun suit! Elliot is a lucky little baby.
So cute!Can you think of any way to do a boy version of this? I loved these for Maddie in the summer, but they don't make anything like it for boys. Maybe if I didn't do the ties and added shorts?
Kate--cute idea! You should totally make one for Sammy! For a boy I am thinking of a sun suit with elastic around the waist and shorts attached. Instead of the ties, make thick tank top straps. You could give it a 1970s look and make it out of a toweling fabric. (You know the fabric that many clothes were made of in the 1970s.) Ok, get to work my dear! ;)
love the use of the bias tape!
miss you!
Vey cute! I will have to try this one for my baby! Thanks for the great instructions!
So cute! Thank you for the very clear and detailed instructions. I can't wait to try this. I think I will attach a little mini skirt to the bottom and pair it with some baby leggings for some European flare!
Erin
I'll send you pictures of Ellie in it when it warms up here in Seattle. She's lucky to have such a talented auntie! xx
Em, this is GORGEOUS! Such a lucky little niece!
That is so adorable. I am new to sewing and had never thought to deconstruct something to make a pattern. That is genius. Thanks for the tutorial
hi there! i think this is the cutest thing ever and would love to guest post it on prudent baby! if you're interested please contact me at jaime at prudentbaby dot com.
XOXO
I just came across this tutorial last night on the Prudent Baby. What a fun idea!
Here's what I came up with: http://www.flickr.com/photos/28356121@N06/5431550584/
Very cute!!
Also, the picture on your page is that from Nyhavn here in Copenhagen?
Post a Comment